

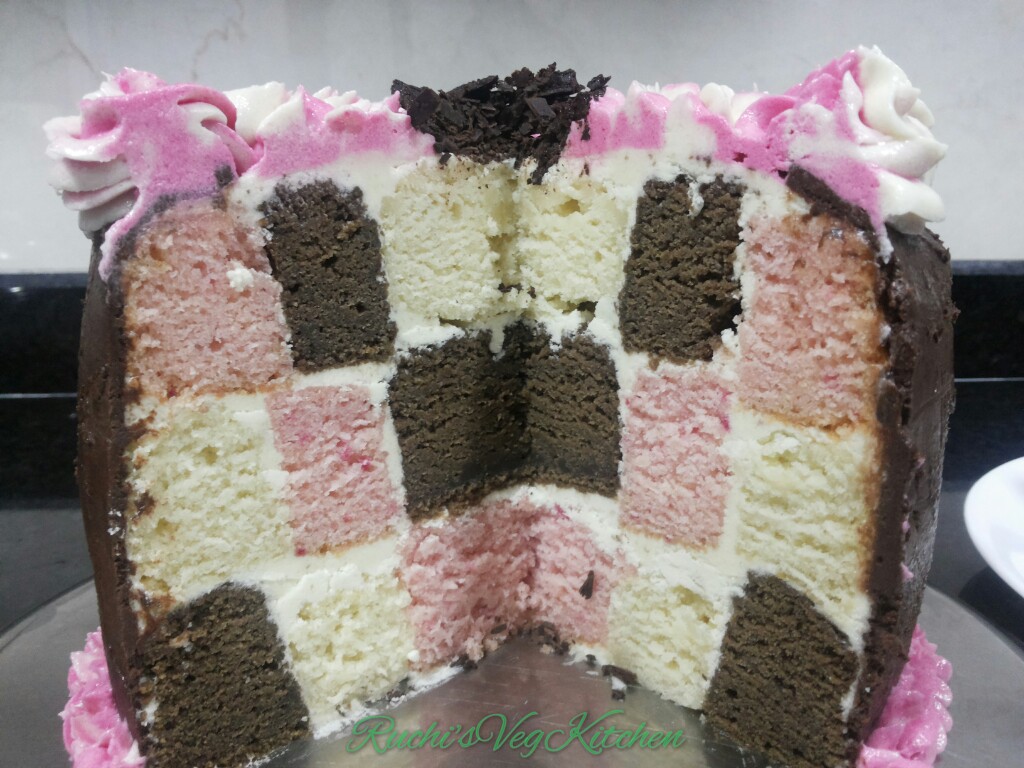
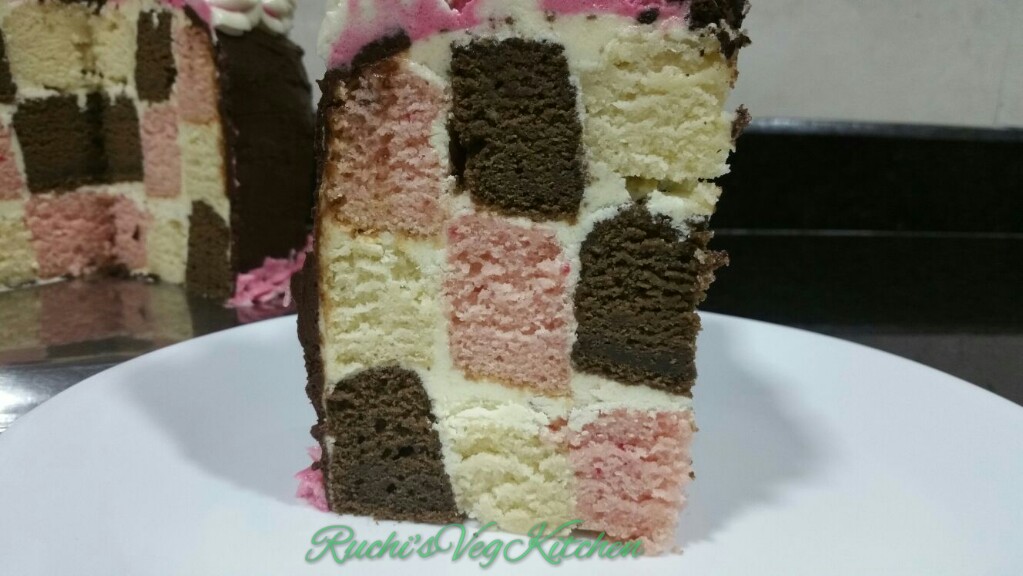
NEAPOLITAN Checker Board Cake with Yummy BUTTER CREAM and CHOCOLATE GANACHE Frosting. Wanted to try this Checker board cake since long and what Occasion can be the best than a Birthday 🙂 🙂 So made on my birthday yesterday . I am supper happy with the outcome.
I used Vanilla, Strawberry and Chocolate Flavour for Checker board. One can use any other combination also. Depends on size of cake you want, one can add or remove the layers of cake. This was my first attempt with Butter Cream Frosting and Chocolate Ganache Frosting. Super Happy with the Outcome.
Only thing one has to take care is BE PATIENCE. 🙂 🙂 🙂 This cake will try your real patience , as small mistake can ruin the shape or beauty of this marvellous cake.
One can checkout my other cakes which are already updated on blog Chocolate Cupcakes , Biscuit Cake, Red Velvet Cake, Black Forest Cake, ButterScotch Cake, Tuxedo Cake, Orange Chocochip Cupcakes
So now without wait lets see detailed recipe and stepwise pics..
INGREDIENTS:
Vanilla Sponge:
- 1 and 1/4 cup All Purpose Flour – Maida
- 1/4 cup Butter
- 1 cup Sugar
- 1 tsp Baking Powder
- 1 tsp Vanilla Essence
- 1.5 cup (Approx) Milk
Chocolate Sponge
- 3 tsp Cocoa Powder
- 1 tsp Instant Coffee Powder
- 1 and 1/4 cup All Purpose Flour – Maida
- 1/4 cup Butter
- 1 cup Sugar
- 1 tsp Baking Powder
- 1 tsp Vanilla Essence
- 1.5 cup (Approx) Milk
Strawberry Sponge
- 1 and 1/4 cup All Purpose Flour – Maida
- 1/4 cup Butter
- 1 cup Sugar
- 1 tsp Baking Powder
- 1 tsp Vanilla Essence
- 1.5 cup (Approx) Milk
- 5 tsp Strawberry Crush
To give a Sharp taste i added Instant coffee Powder also to Chocolate batter. In stead of Strawberry crush, one can add Fresh Strawberry puree also.
For Butter Cream Frosting:
- 1 cup Butter (Unsalted)
- 6-7 cup Powdered Sugar
- 1 tsp Vanilla Essence
- 2 tsp Whipping Cream / 3-4 tsp Milk
For Chocolate Ganache:
- 1 cup Whipping Cream
- 1 cup Compound Chocolate Chopped
- 2 tsp Honey
METHOD:
Preheat oven to 160 degree C. Grease cake pan very well with butter/oil and dust it with flour. Coat flour on all sides, tap off the excess and set aside.
For Vanilla Sponge : Take flour, baking powder in a sifter. Sieve well. Take it in a bowl. In another bowl Beat Butter and sugar till light and fluffy. Now add flour mixture and milk. Add in batches Don’t add at a time. Add Vanilla Essence and mix very nicely.
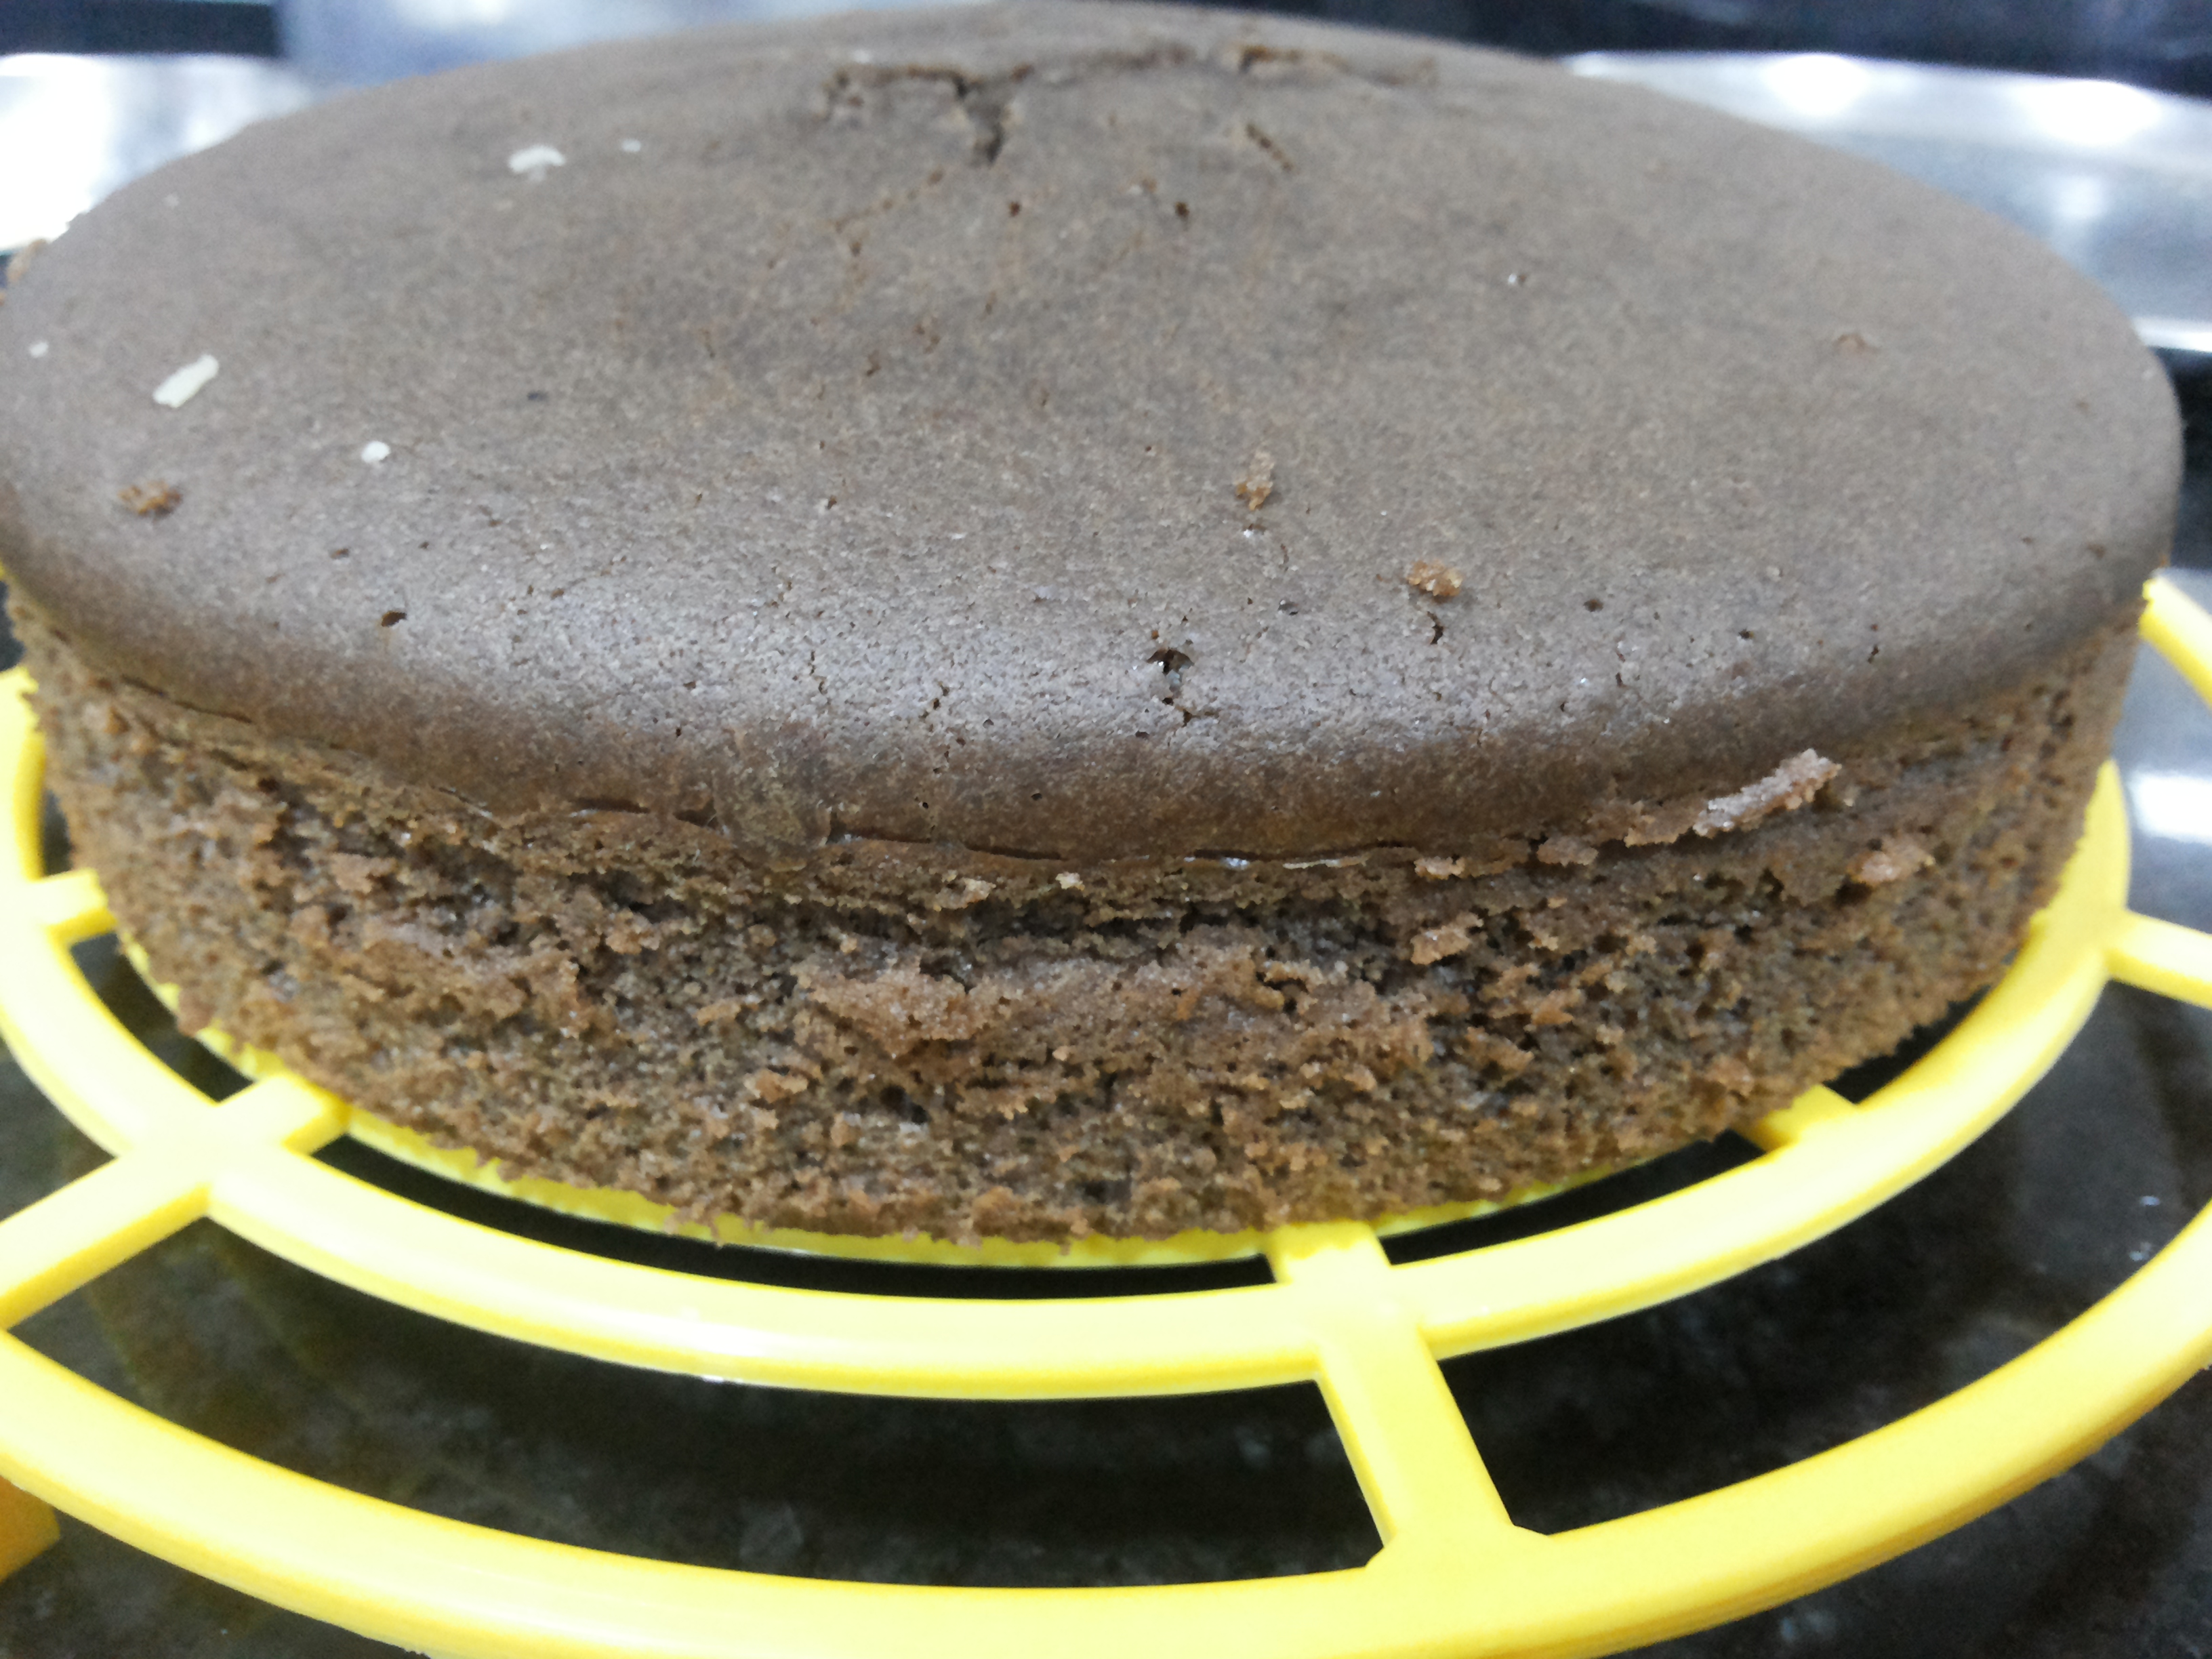
For Chocolate Sponge : Take flour, Cocoa Powder, Instant Coffee Powder, baking powder in a sifter. Sieve well. Take it in a bowl. In another bowl Beat Butter and sugar till light and fluffy. Now add flour mixture and milk. Add in batches Don’t add at a time.
For Strawberry Sponge : Take flour, baking powder in a sifter. Sieve well. Take it in a bowl. In another bowl Beat Butter and sugar till light and fluffy. Add Strawberry Crush and mix it. Now add flour mixture and milk. Add in batches Don’t add at a time.
To make Strawberry Puree.. Chop strawberry and make smooth paste in mixer. Strain the puree and add in batter.
Pour batter on dusted Cake pan. Bake for for 40 to 45 mins until the toothpick inserted comes out clean.Remove it and let it cool a little, now invert it in a cooling rack and let it cool.
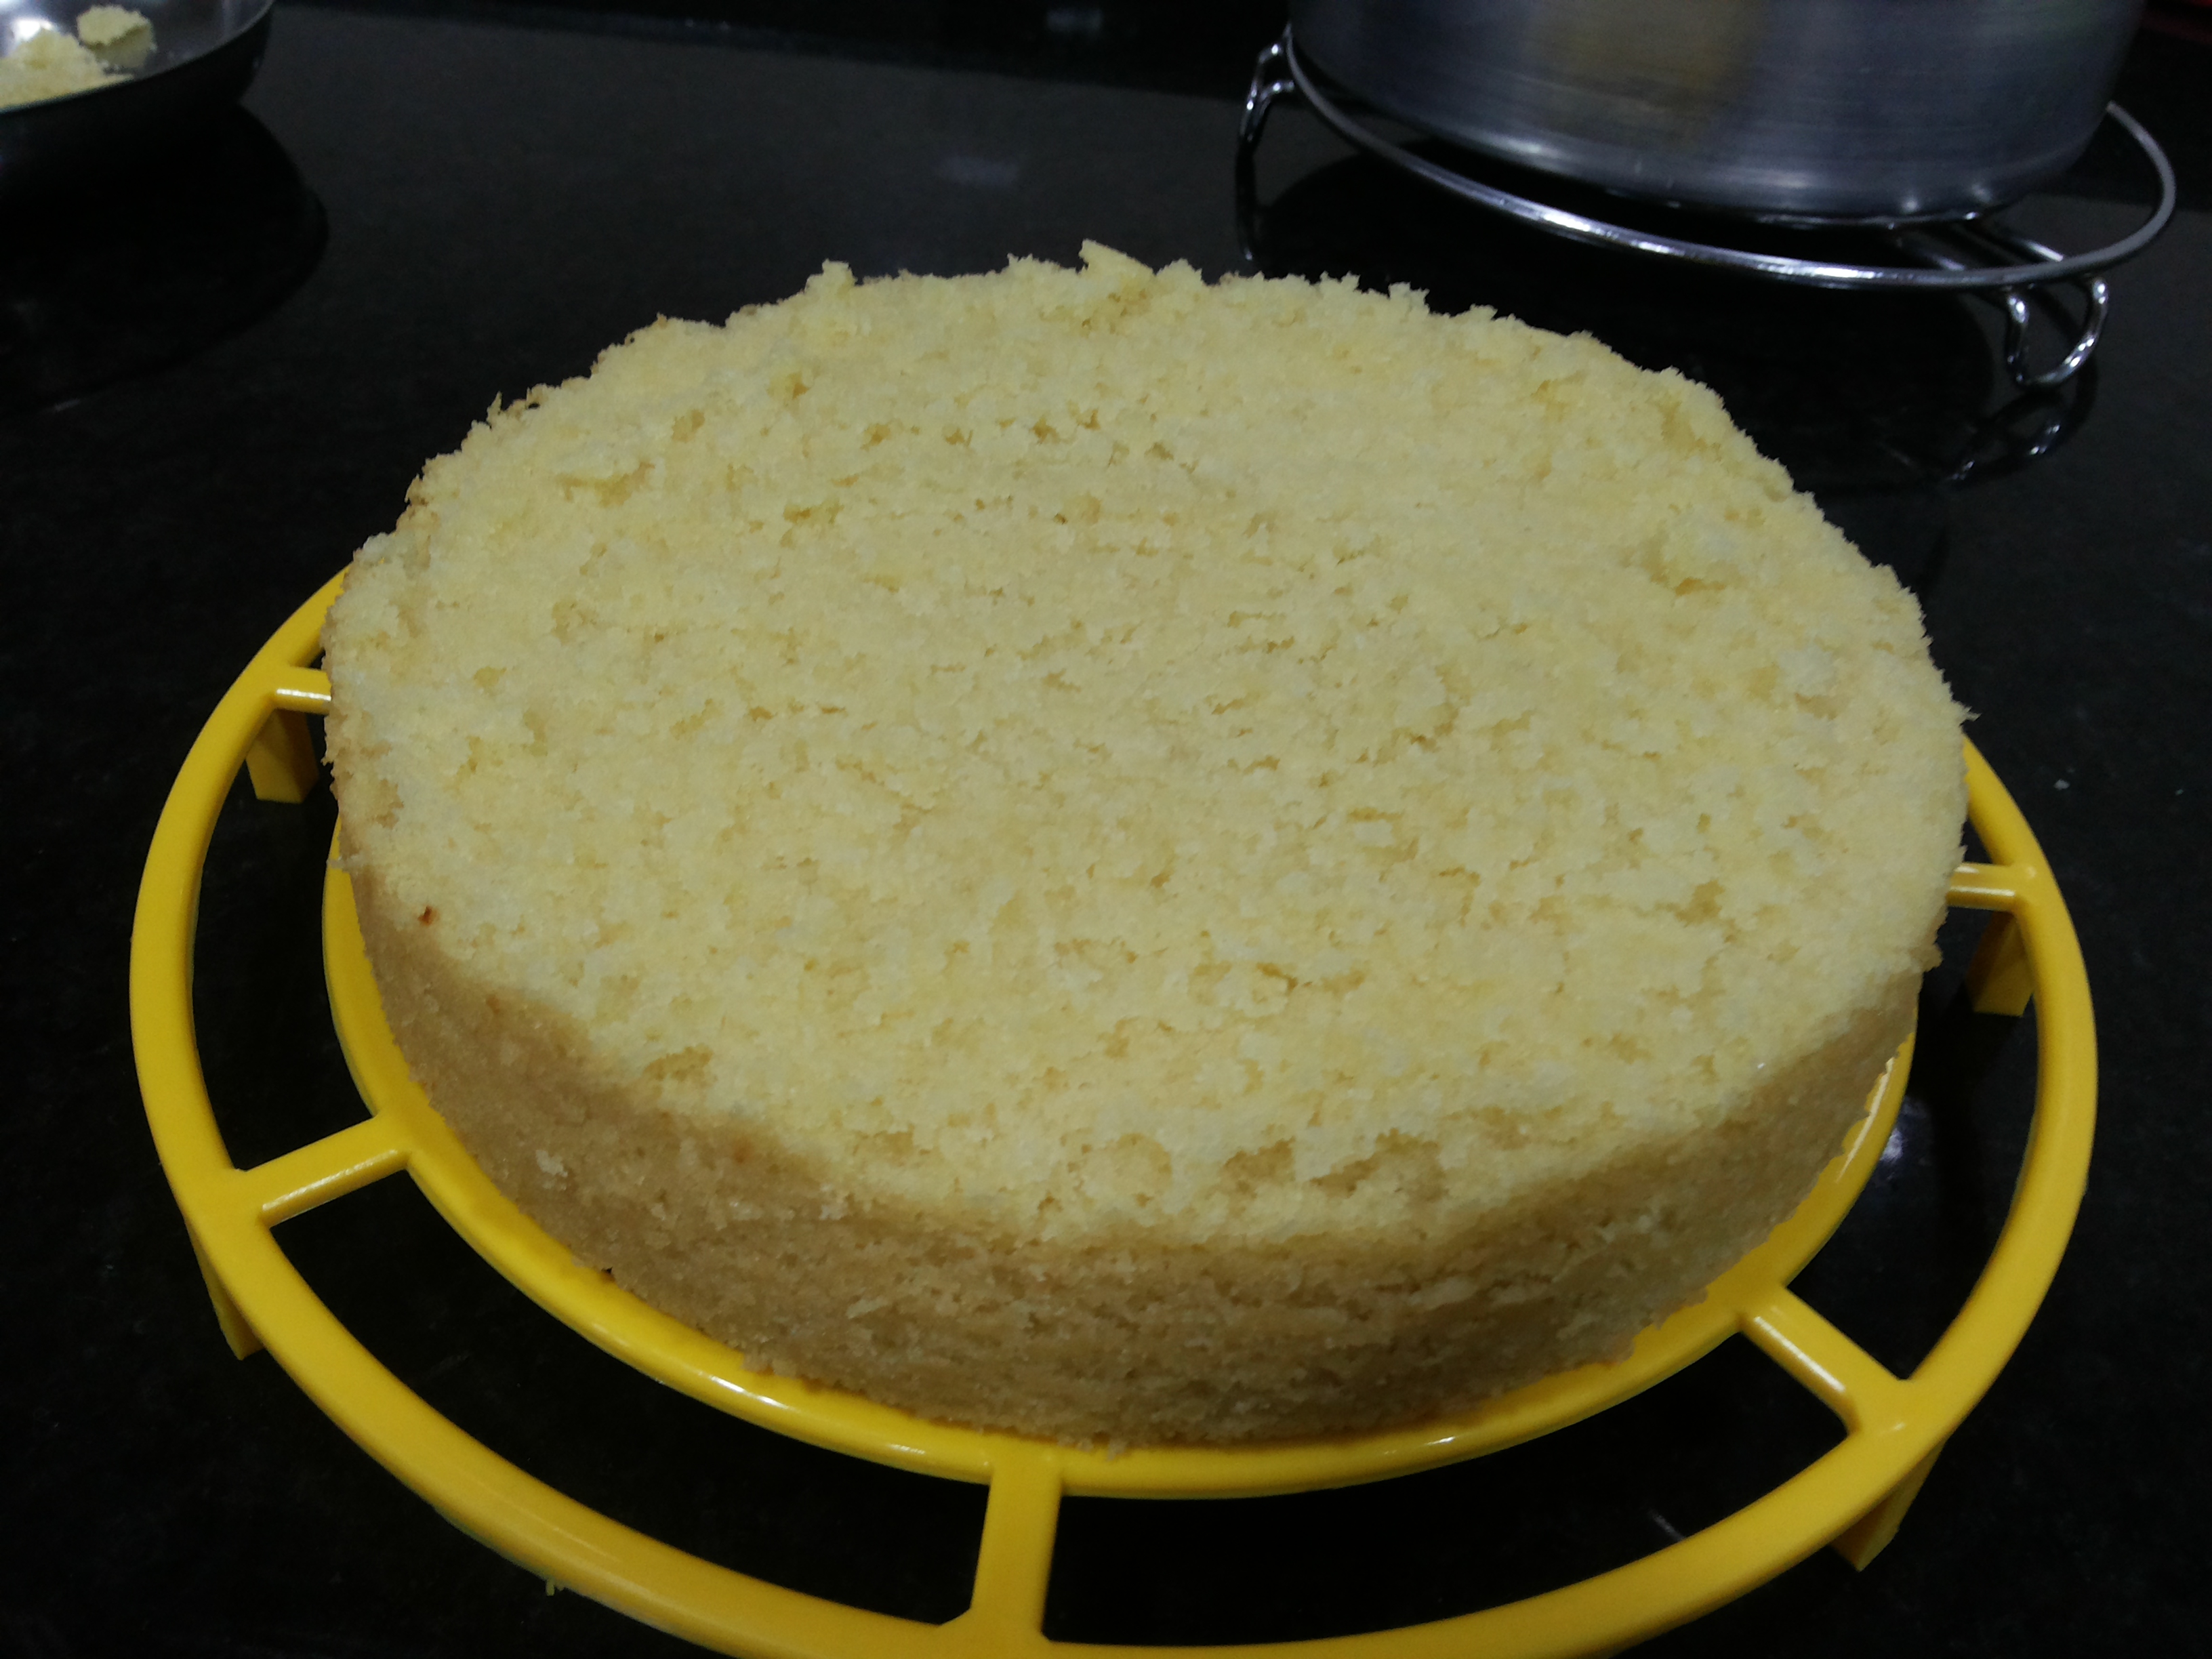
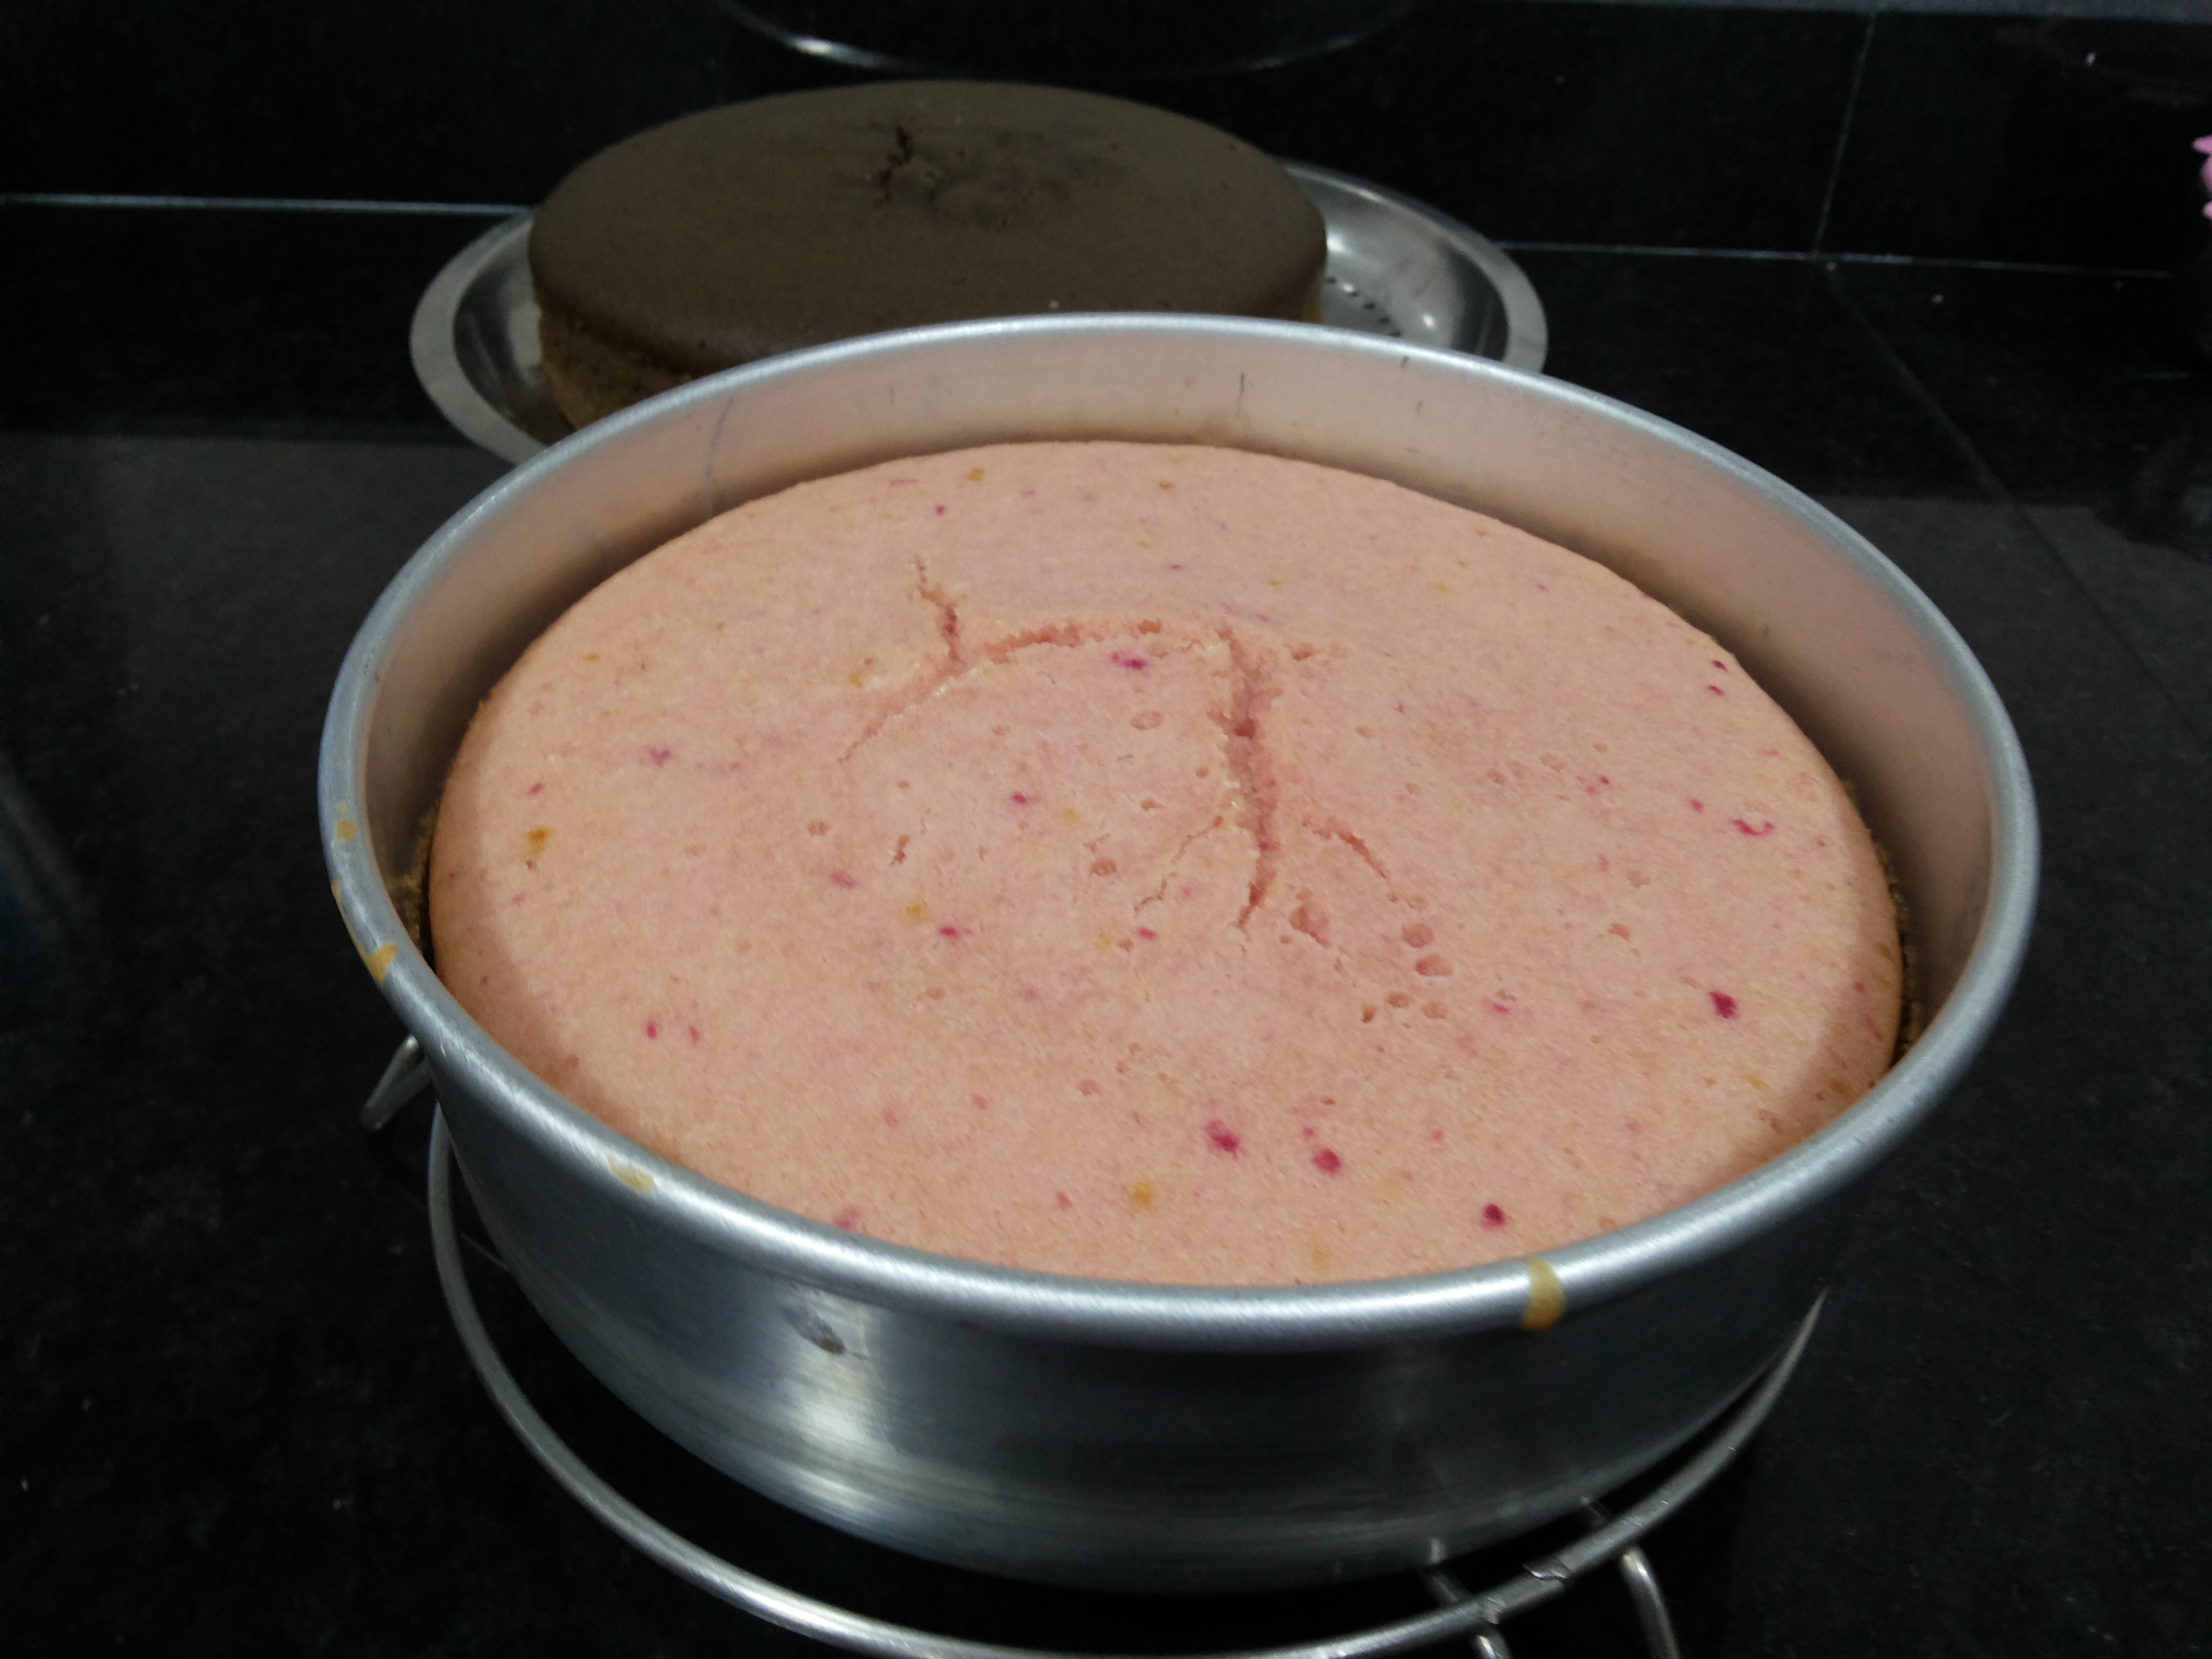
Allow all 3 sponge cakes to cool completely and preferable keep in freeze for an hour or so. Mean time lets make our butter cream frosting ready.
BUTTER CREAM RECIPE:
In a wide bowl take butter, whip it very nicely till light and fluffy. Now keep adding Powdered sugar cup by cup. And Whip it Properly. Add Vanilla Essence and Whipping Cream or milk. Keep Whipping till smooth and firmed peak. Take butter cream in a spoon , if it wont fall down from spoon , its done. If you feel Cream is too dry add some Milk, just a tsp at a time and mix. If you feel Cream is too soft, add 1/2 cup Powdered Sugar and keep whipping. If you wont whip nicely, the taste of sugar and butter will go separate while eating. Once done Keep it aside.

One can Store Butter cream for 3-4 days on room temperature or upto a month in freeze.
NOW THE REAL WORK STARTS 🙂 🙂 Cutting and assembling all the 3 sponge cake..
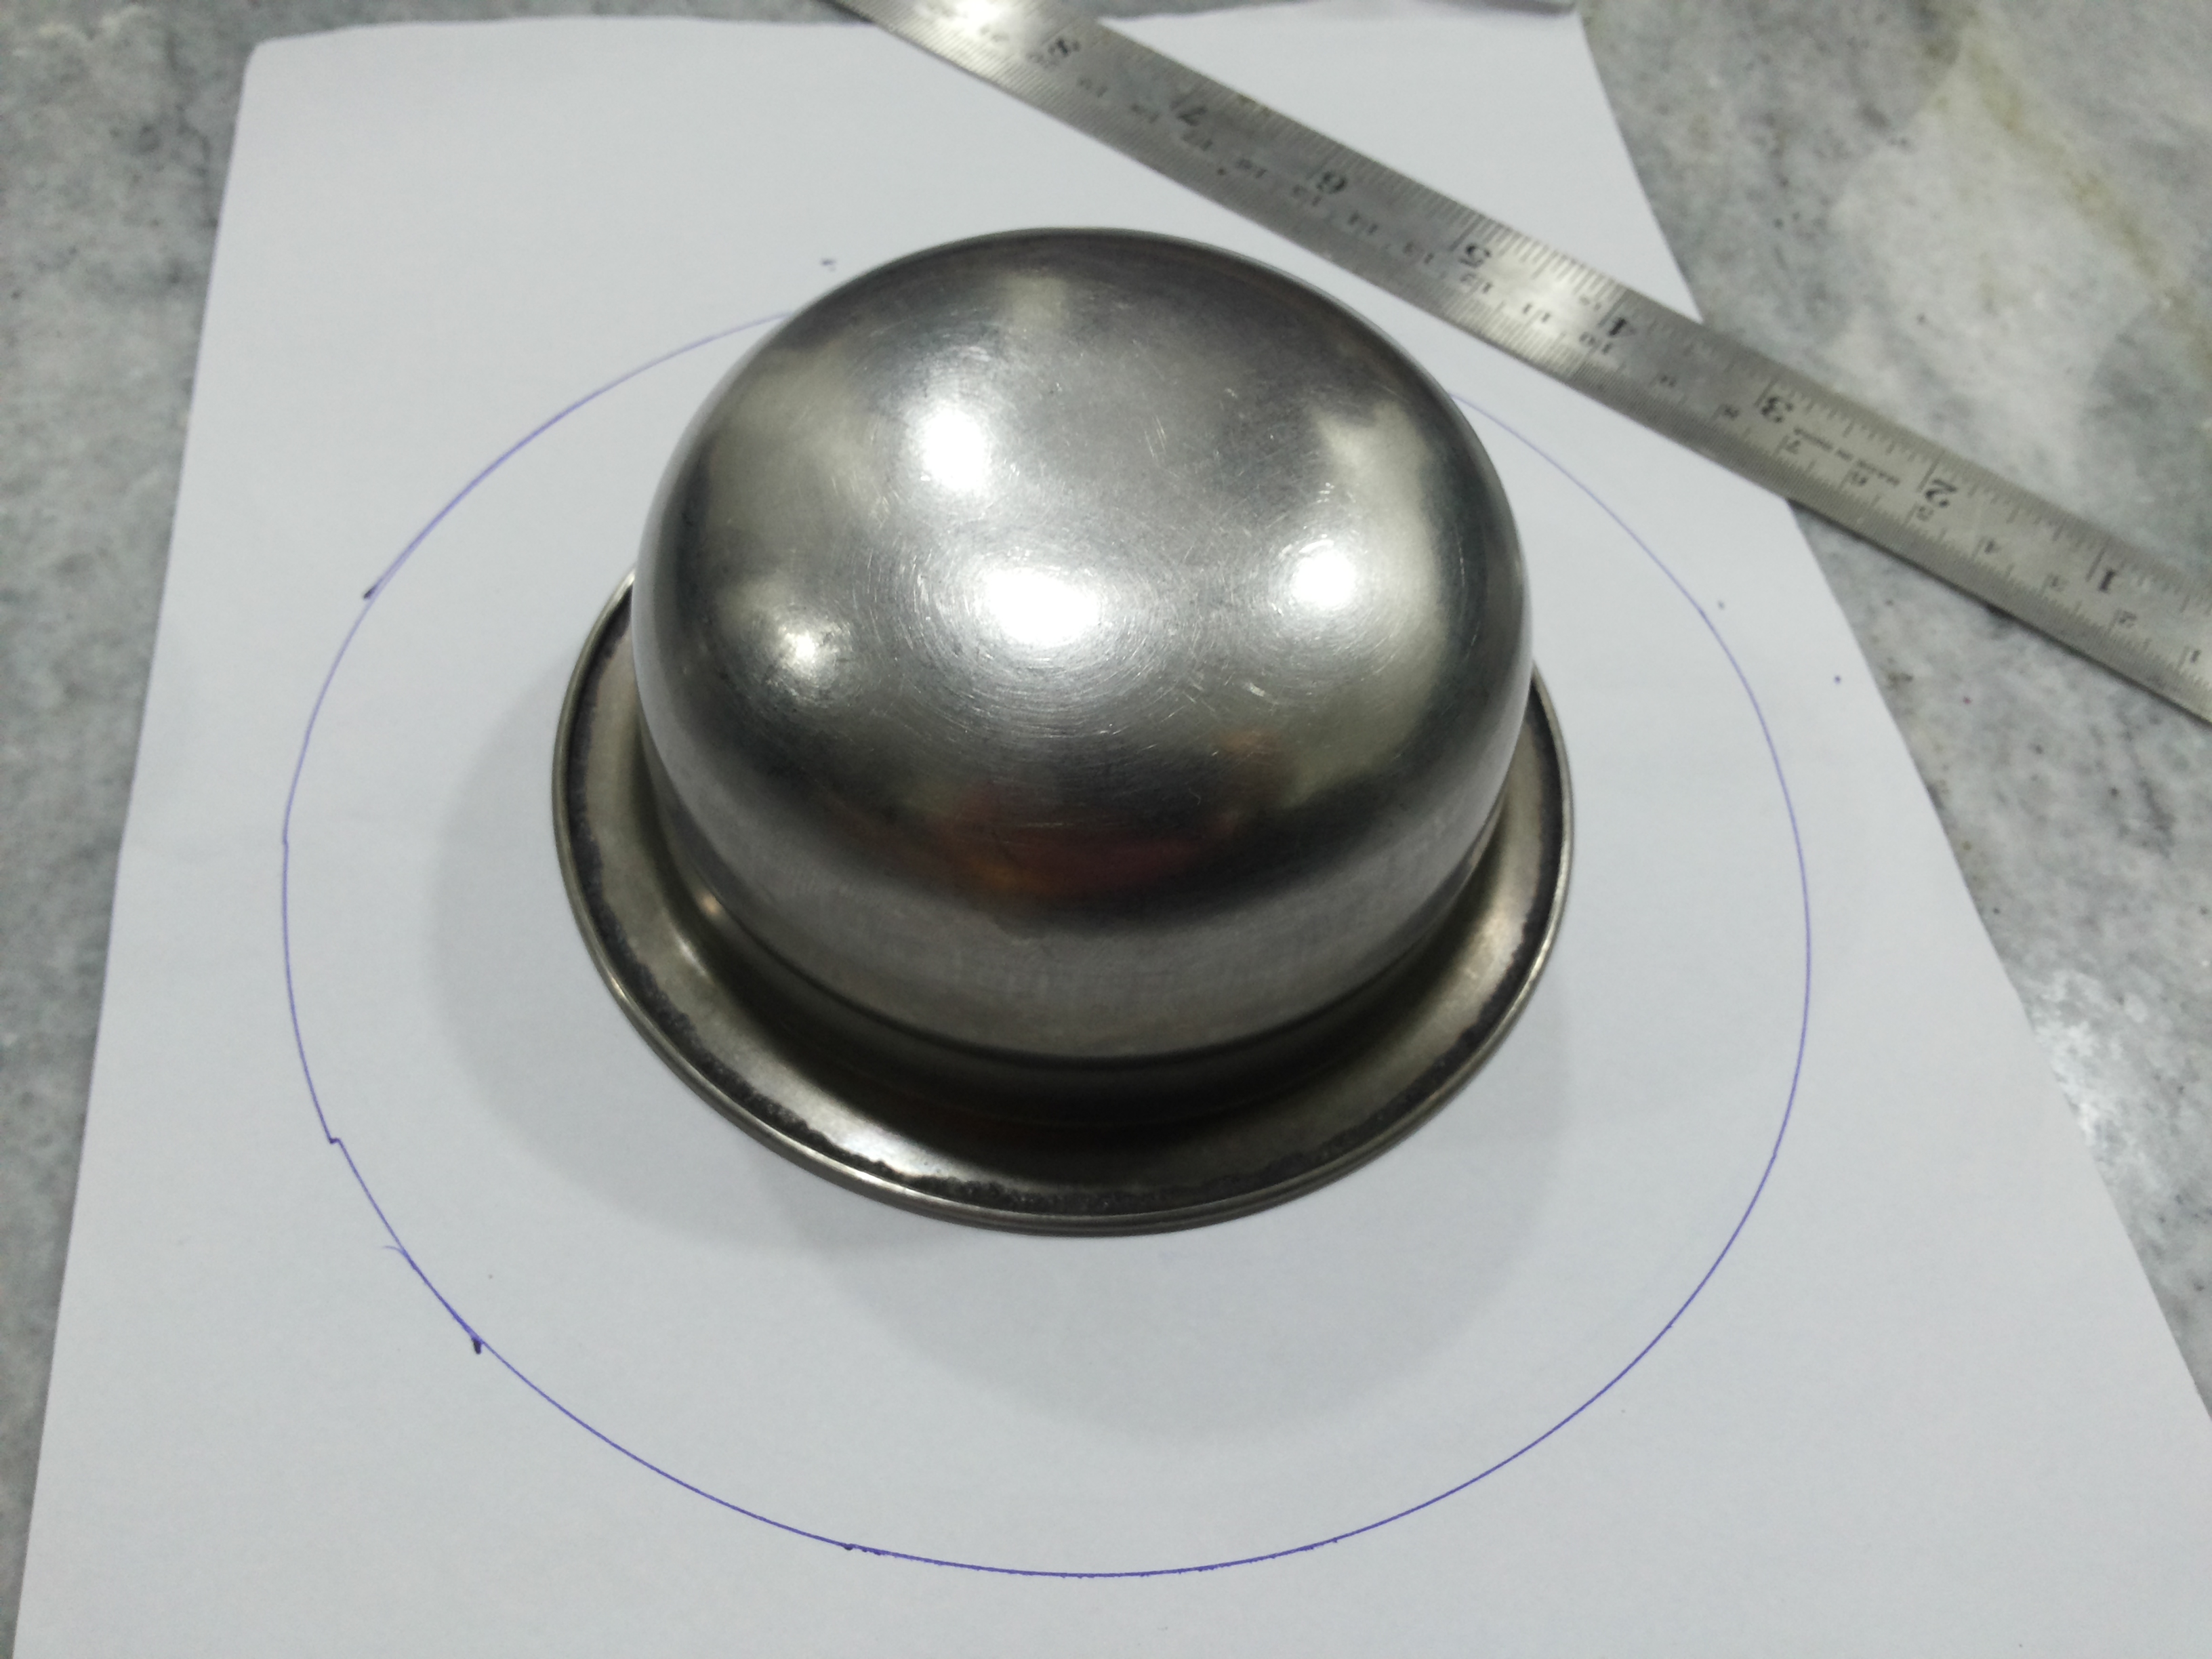
First of all we will make template for cutting sponge. If you check on Internet there are many methods to make this template, i am trying to show you the easiest way.
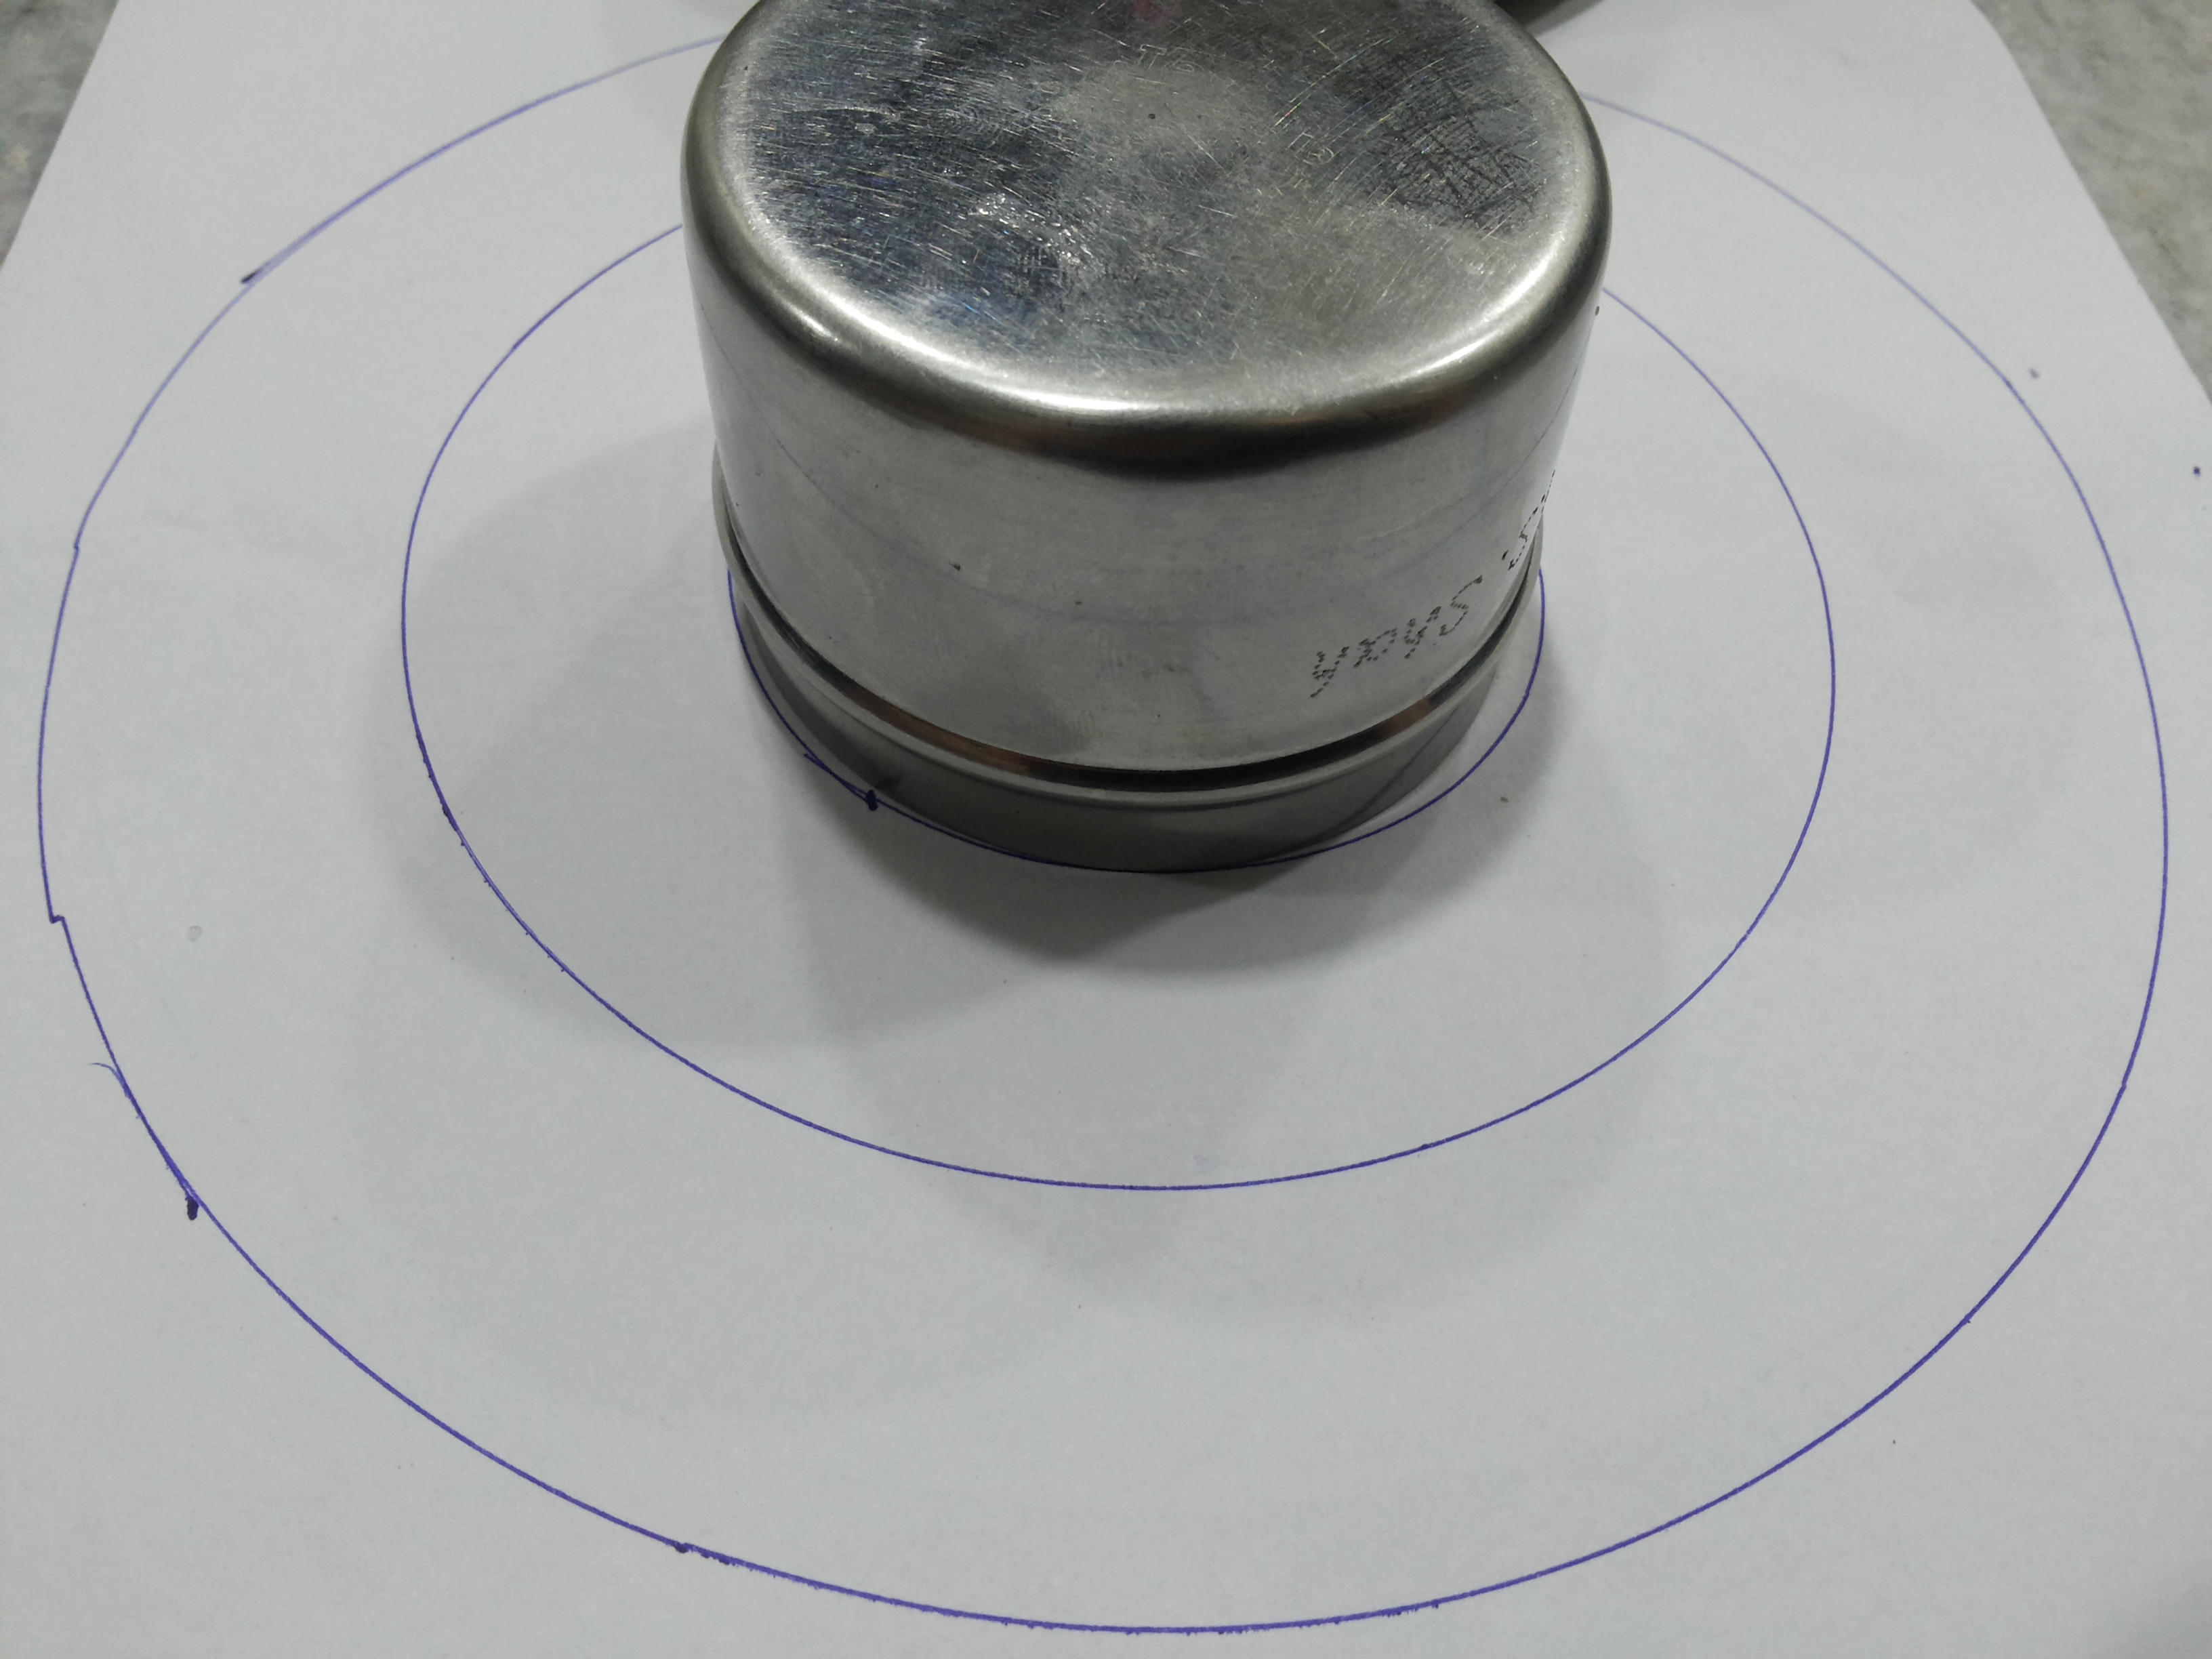
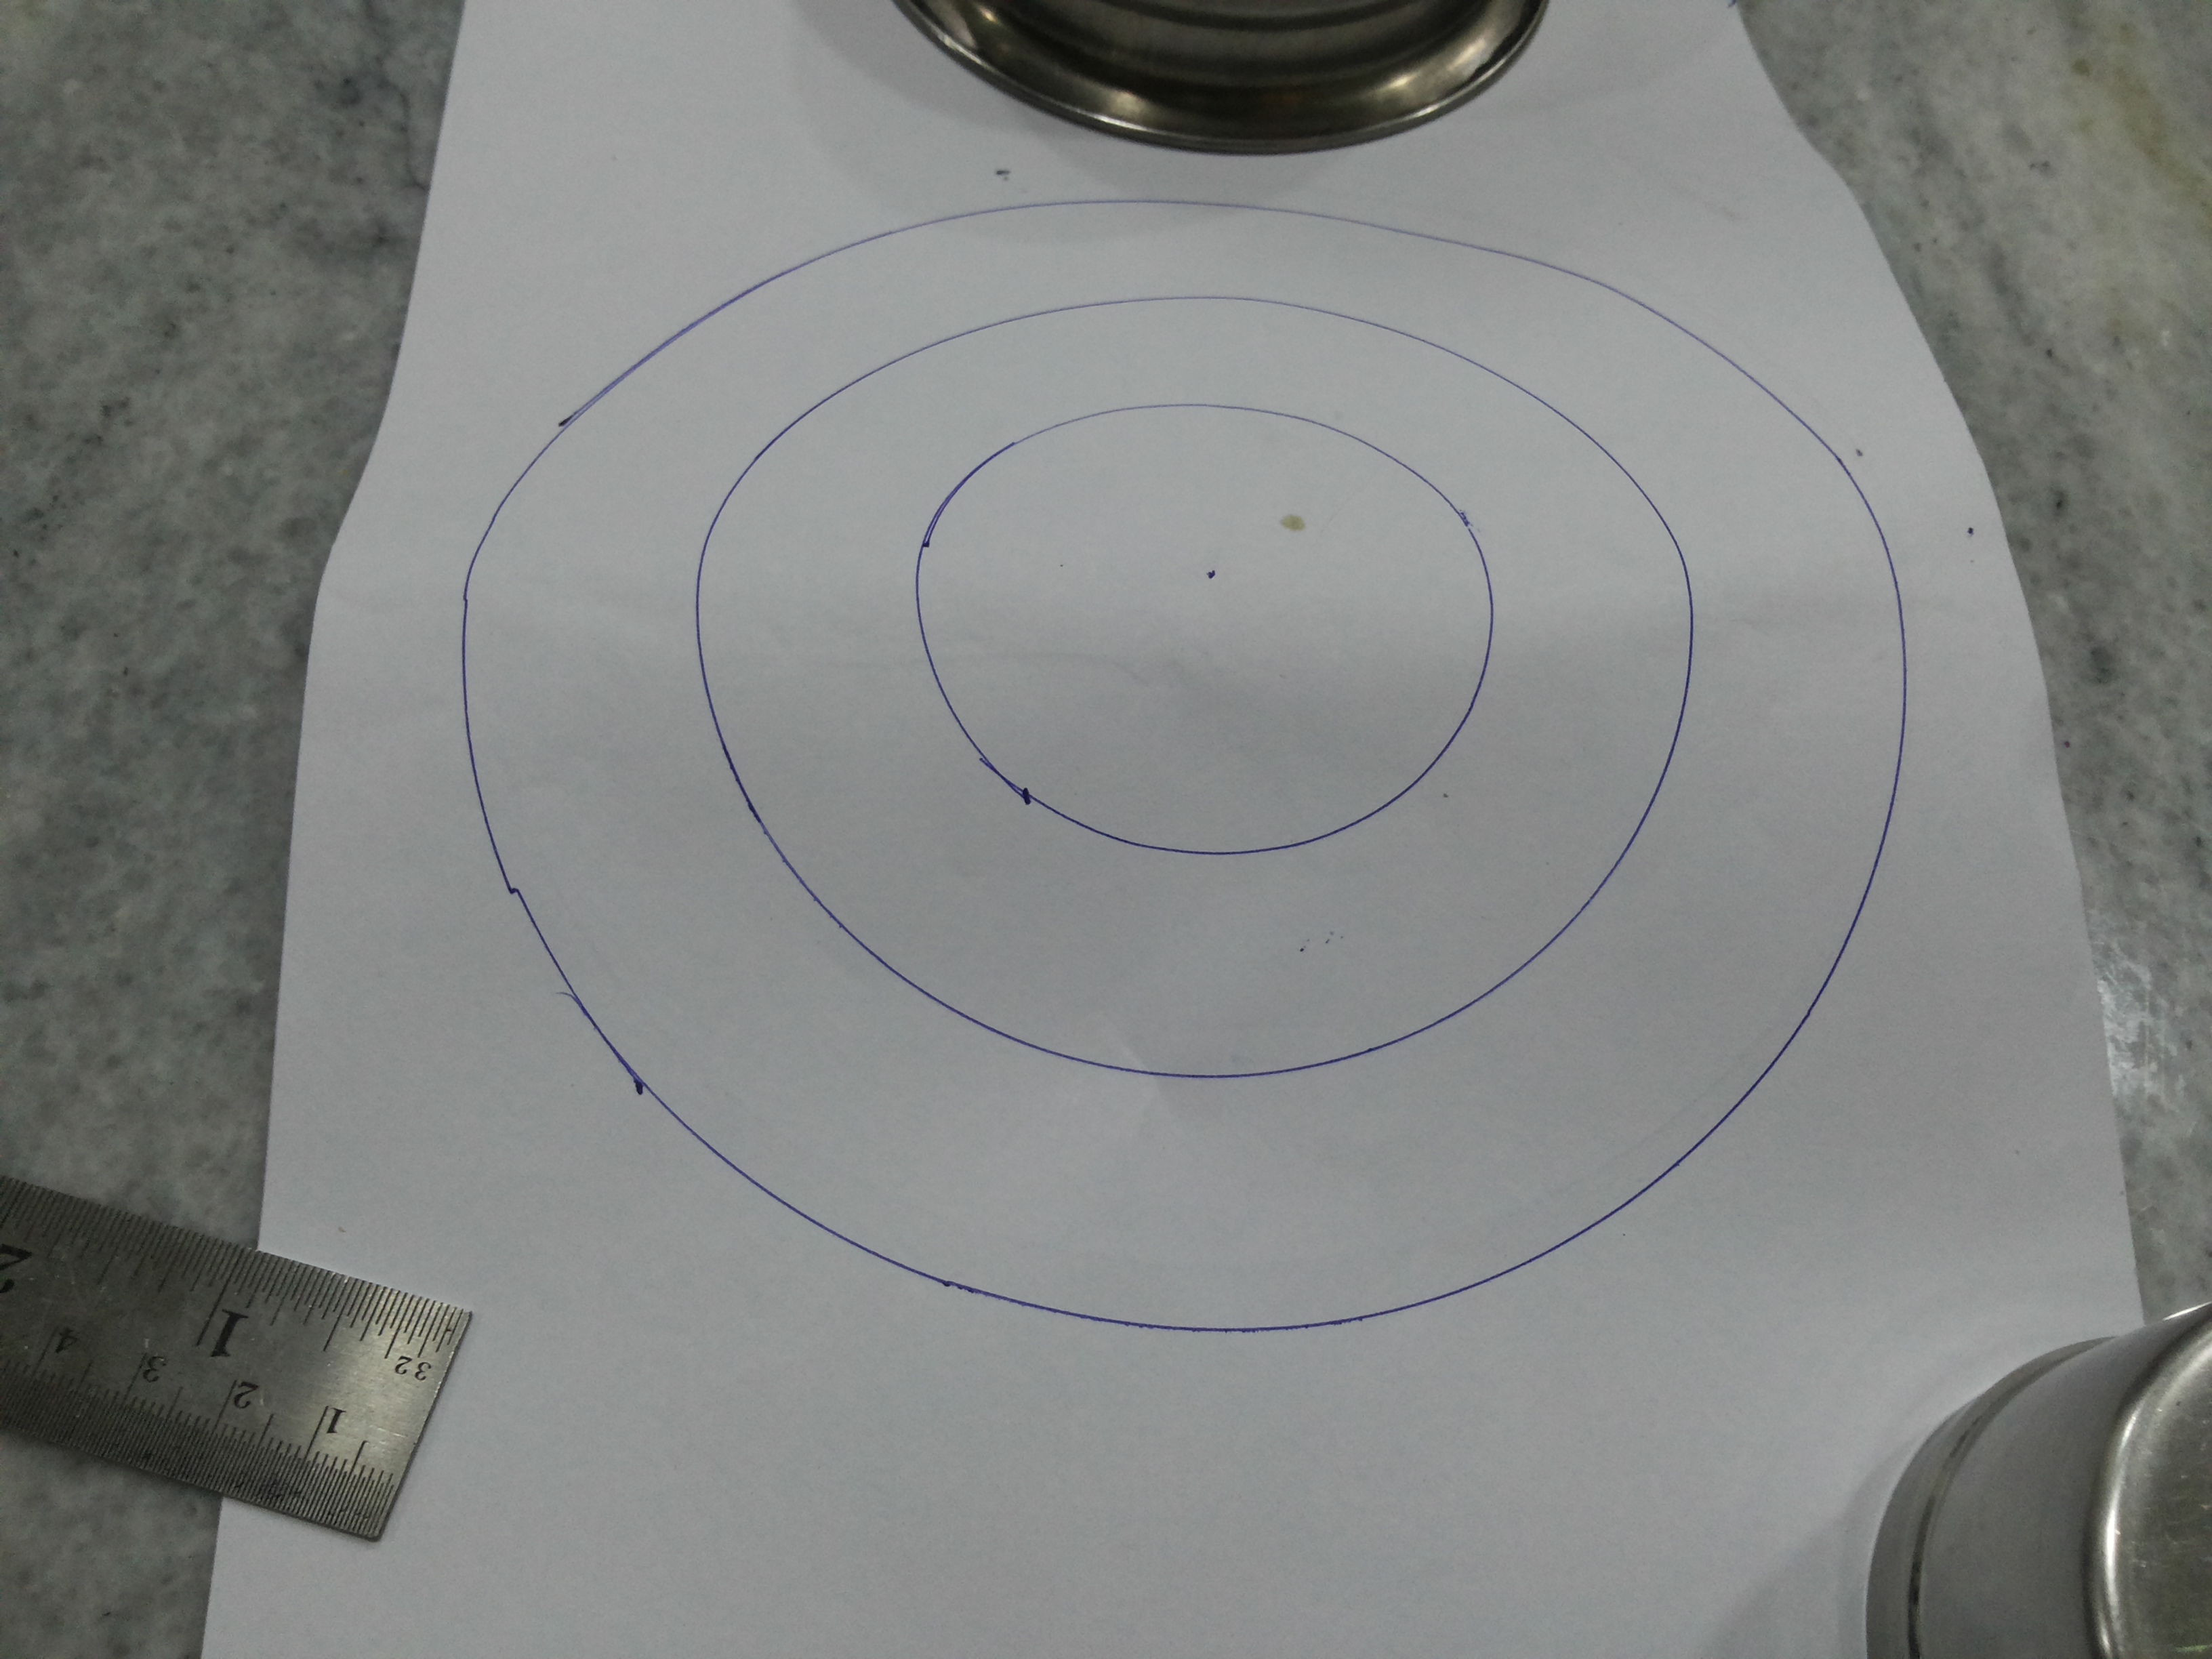
On a plain Paper Take mark for outer line of your cake pan. With help of Scale measure the center point of it. From center point to Outer line mark 2 more point on same distance. With help of Compass make a circle, or one can use other utensils like small vessel or that size and make a mark. Same with small circle. Cut the paper from outer line and your template is ready.
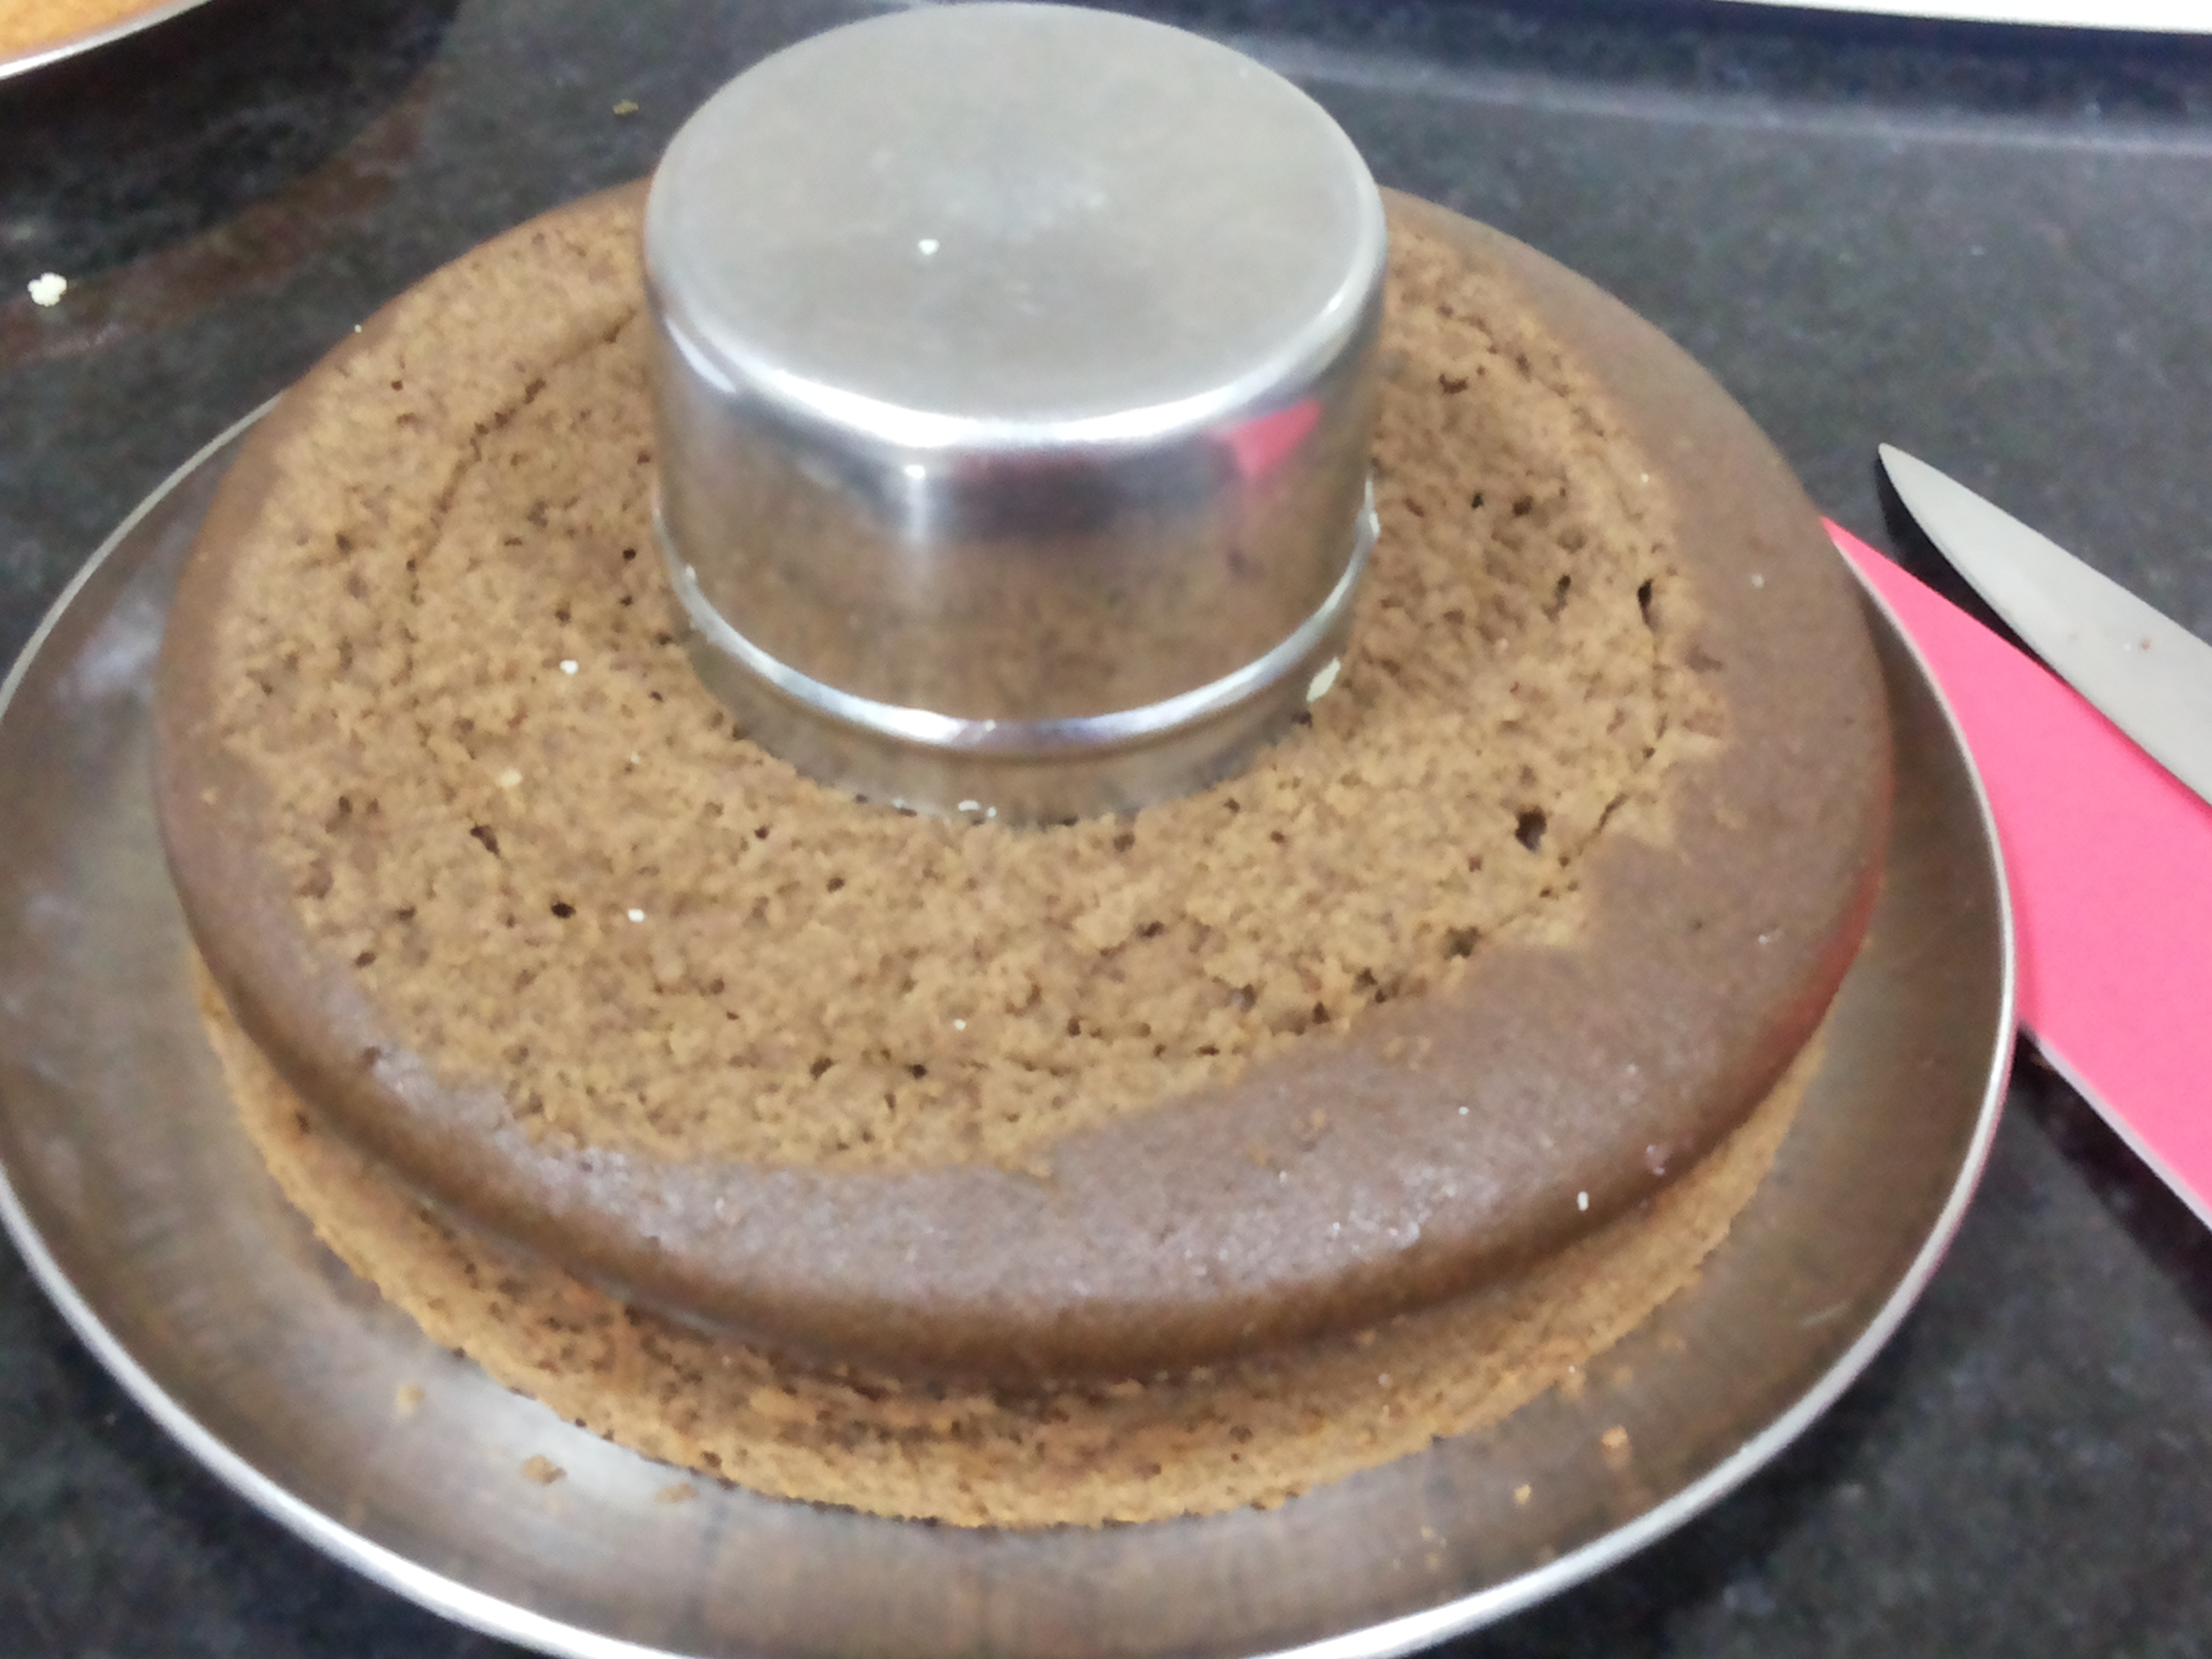
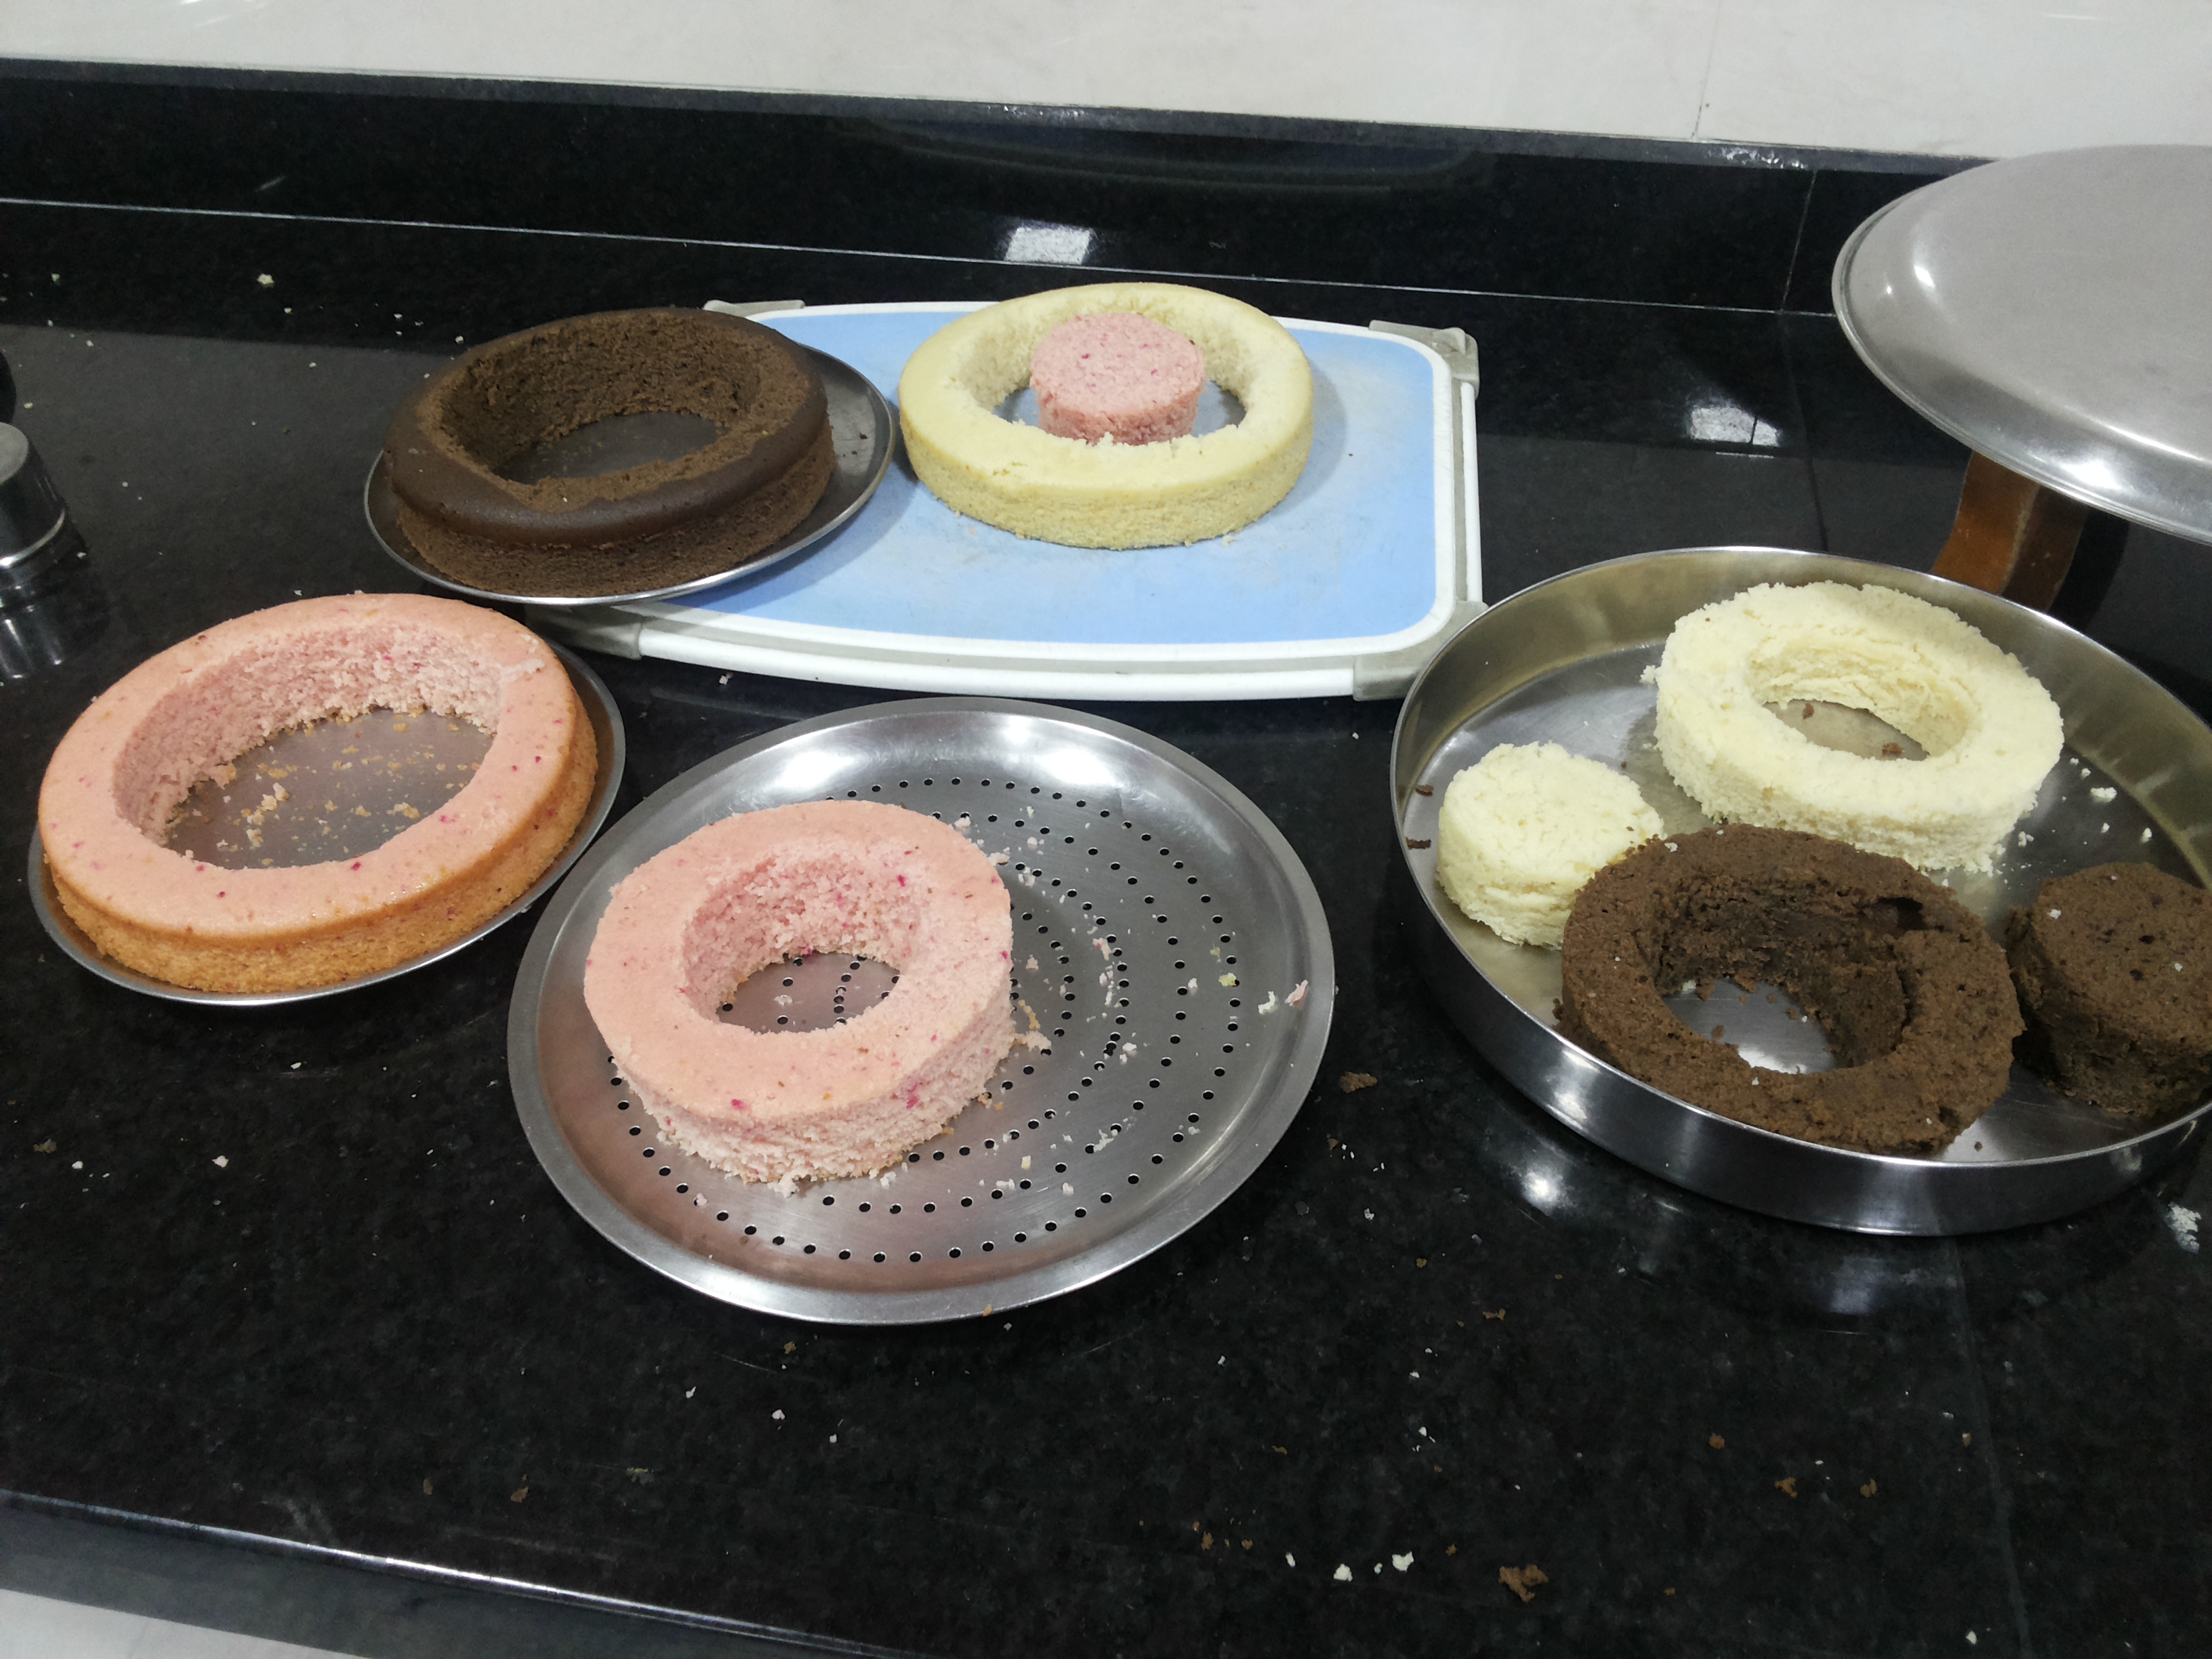
Cut the dome from the cake, place the template over it and secure with toothpick. Now cut the cake through that. Do this for all 3 cakes.

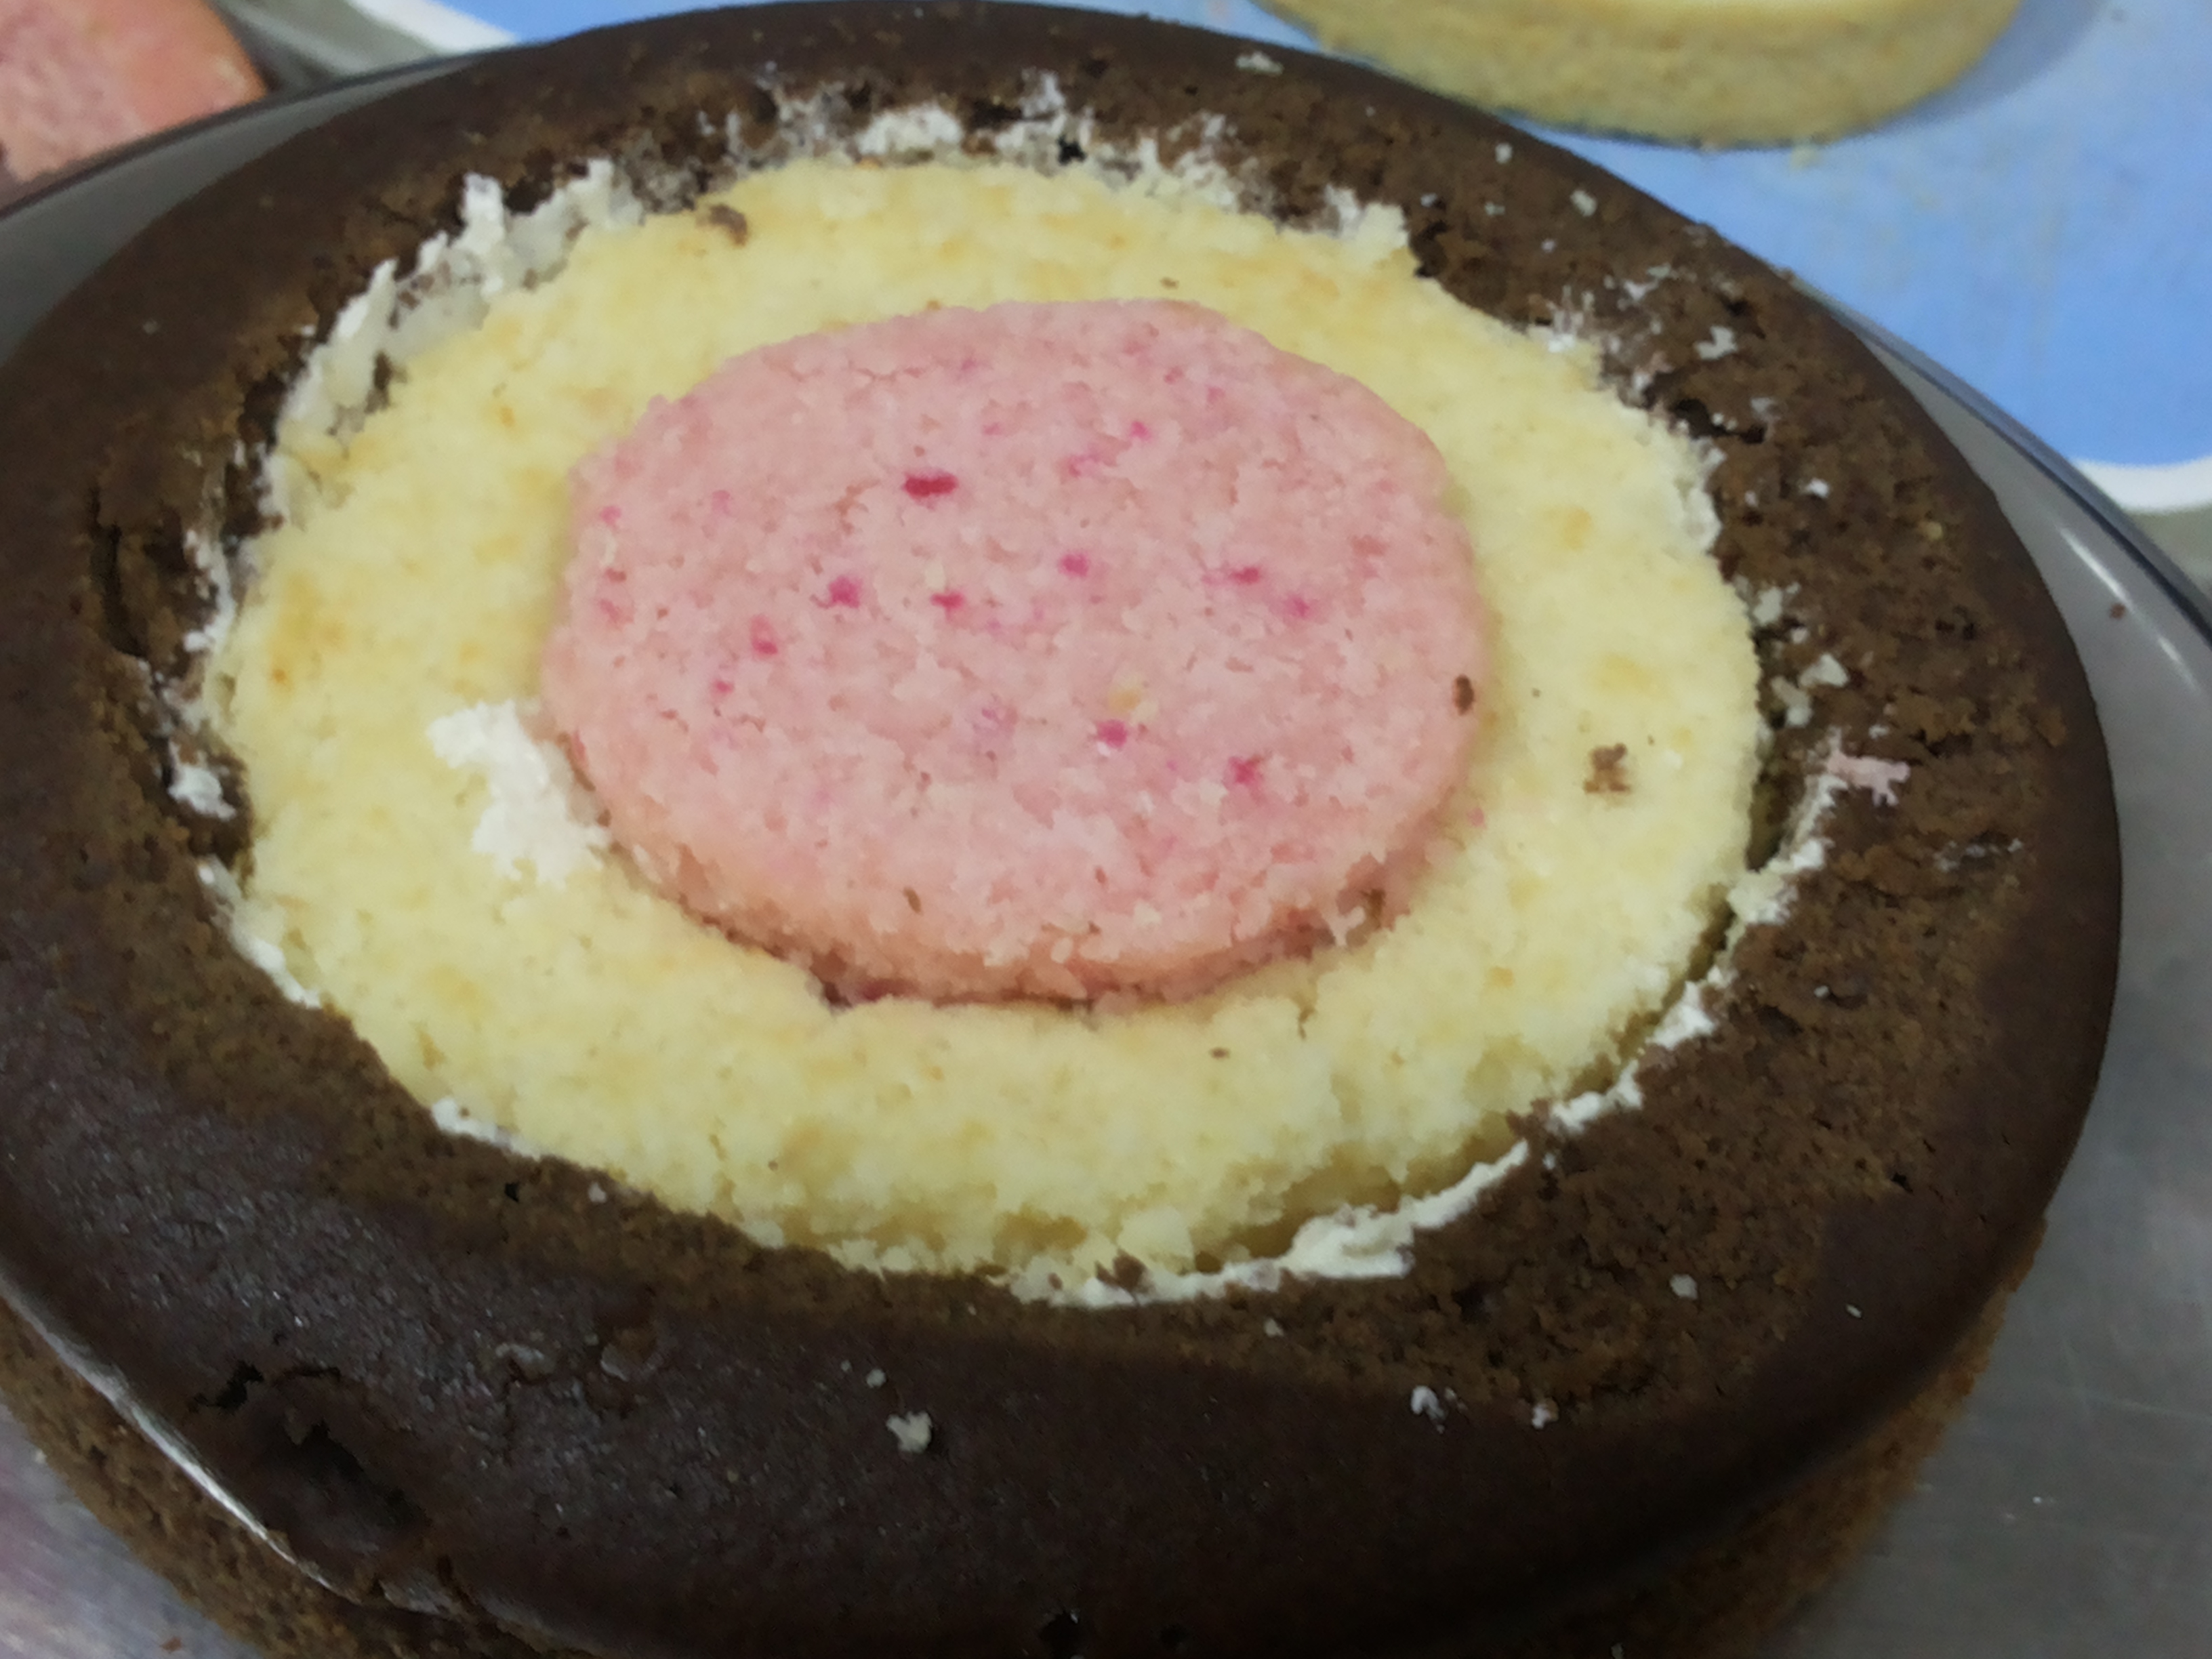
Now start with chocolate cake, spread icing over the sides, place a vanilla layer in it and spread icing in the side and place a strawberry layer in the middle.Do this for all cakes.
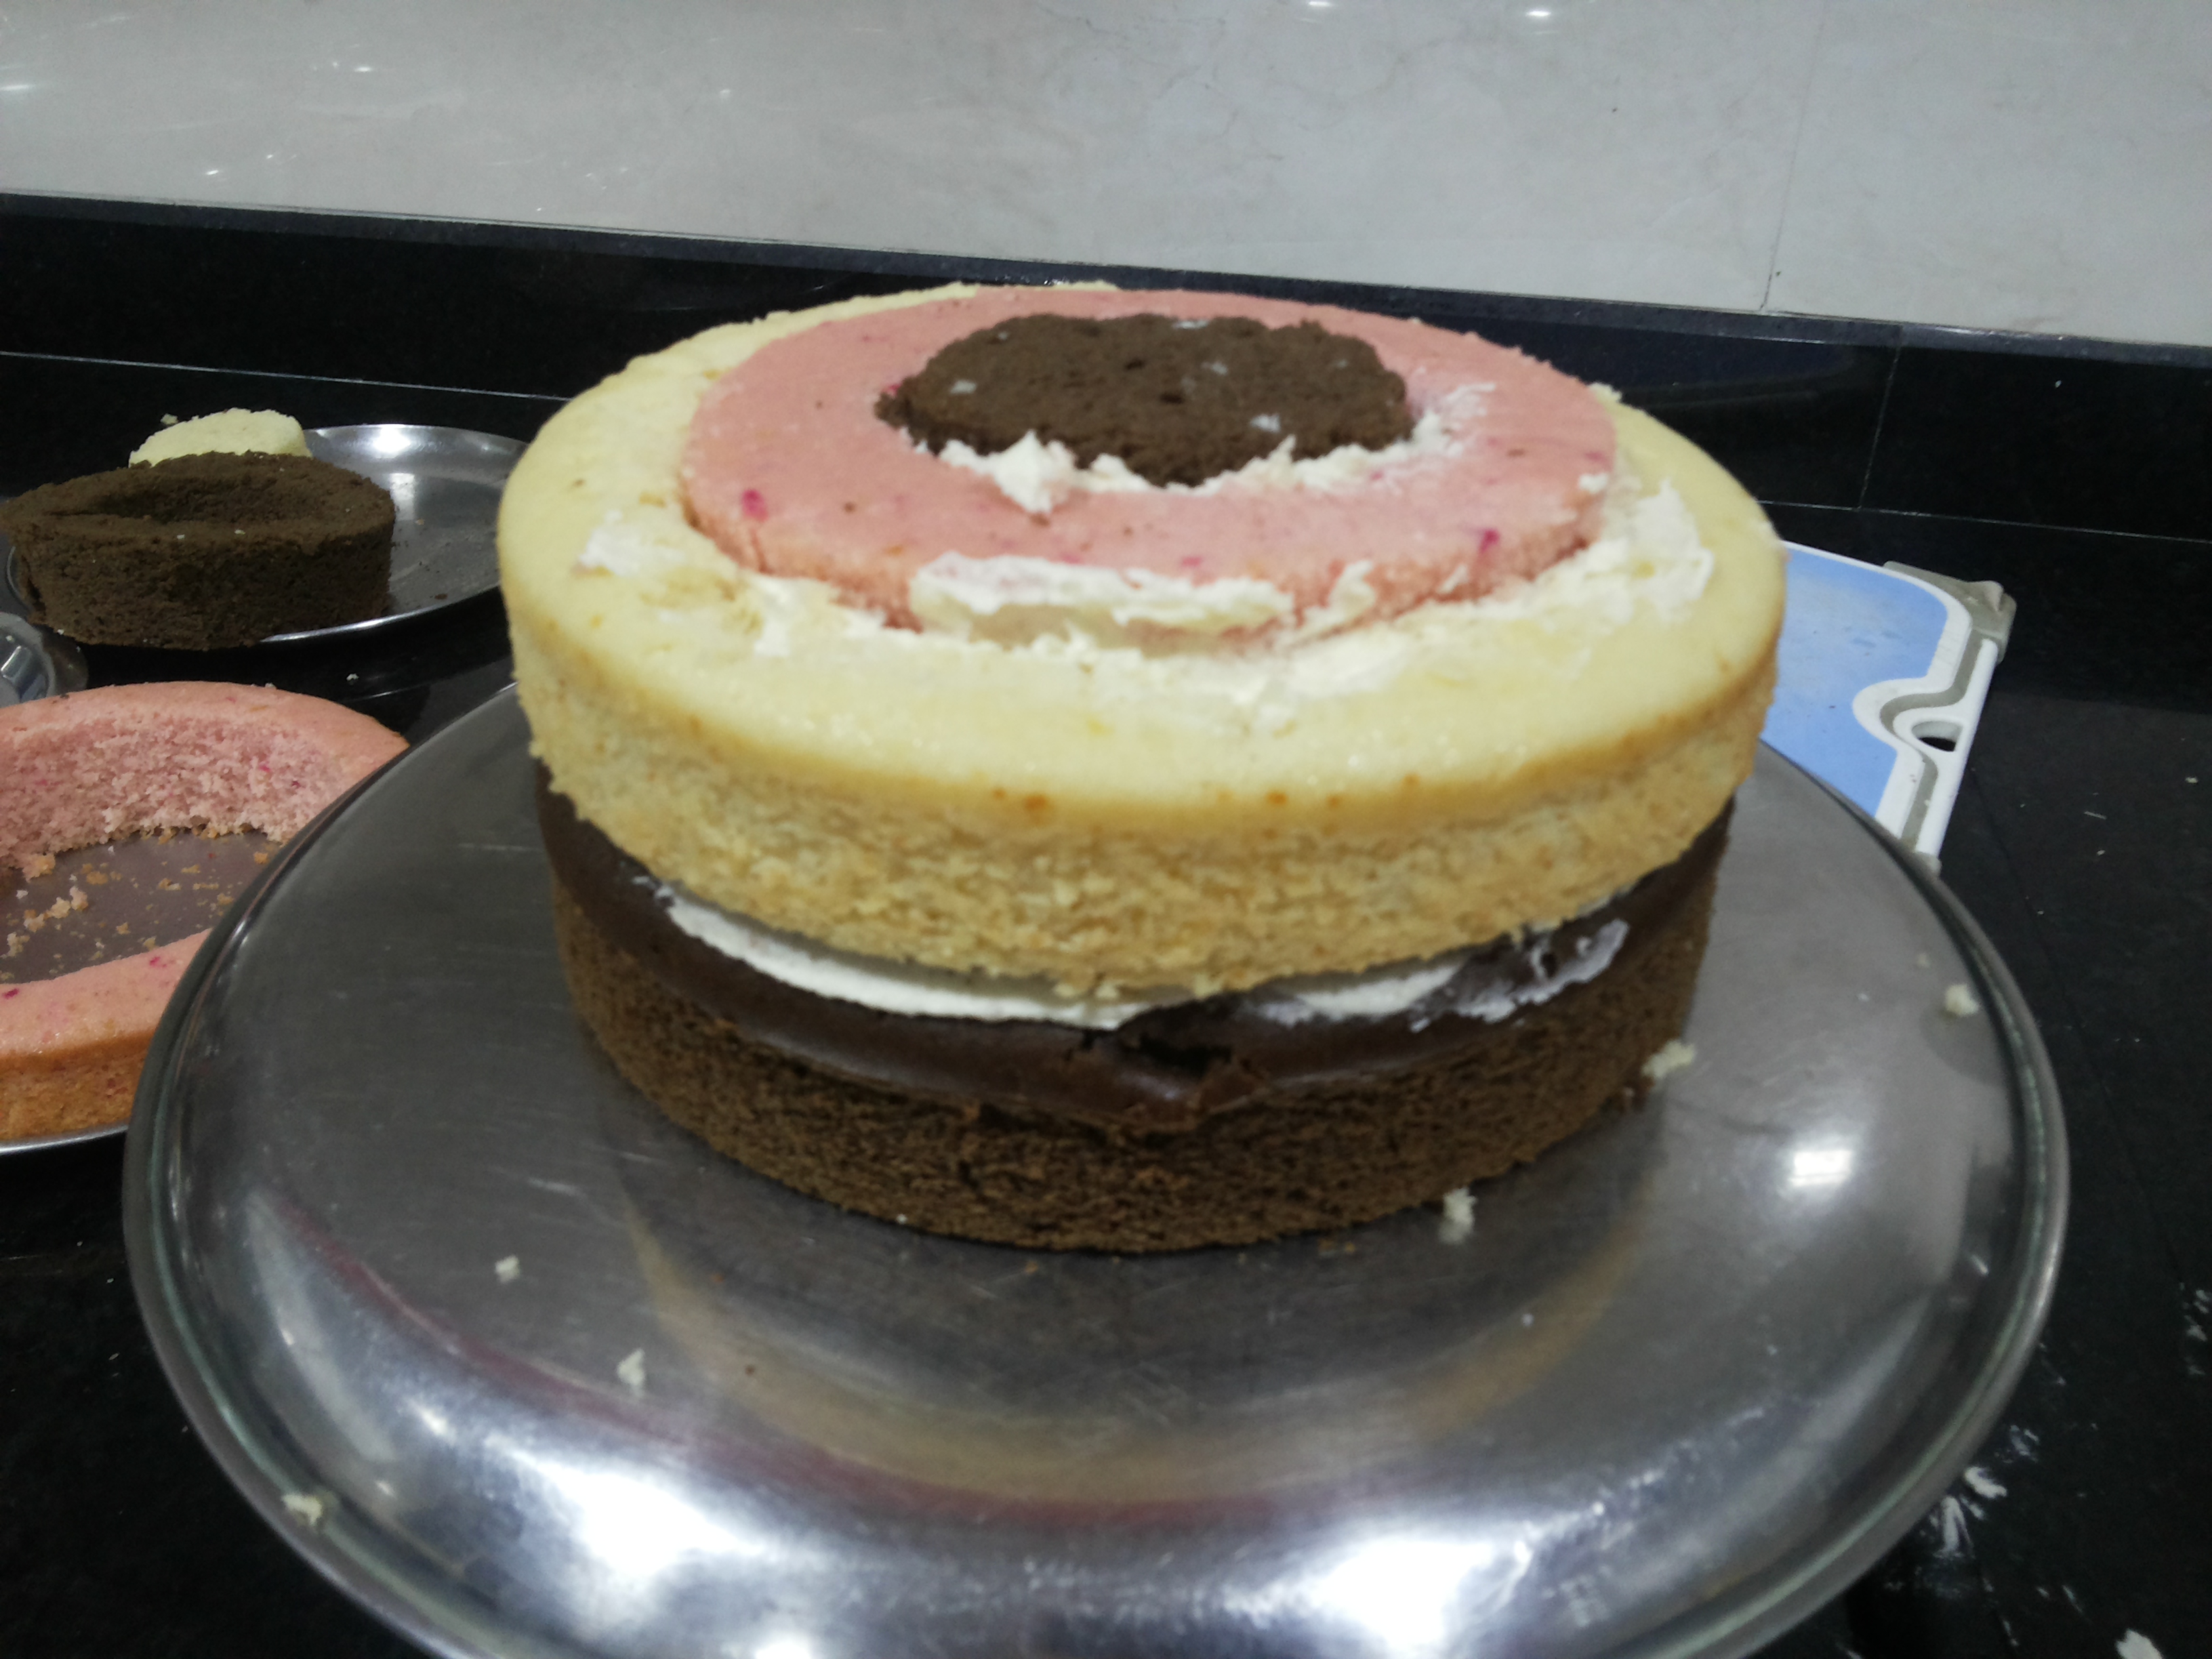
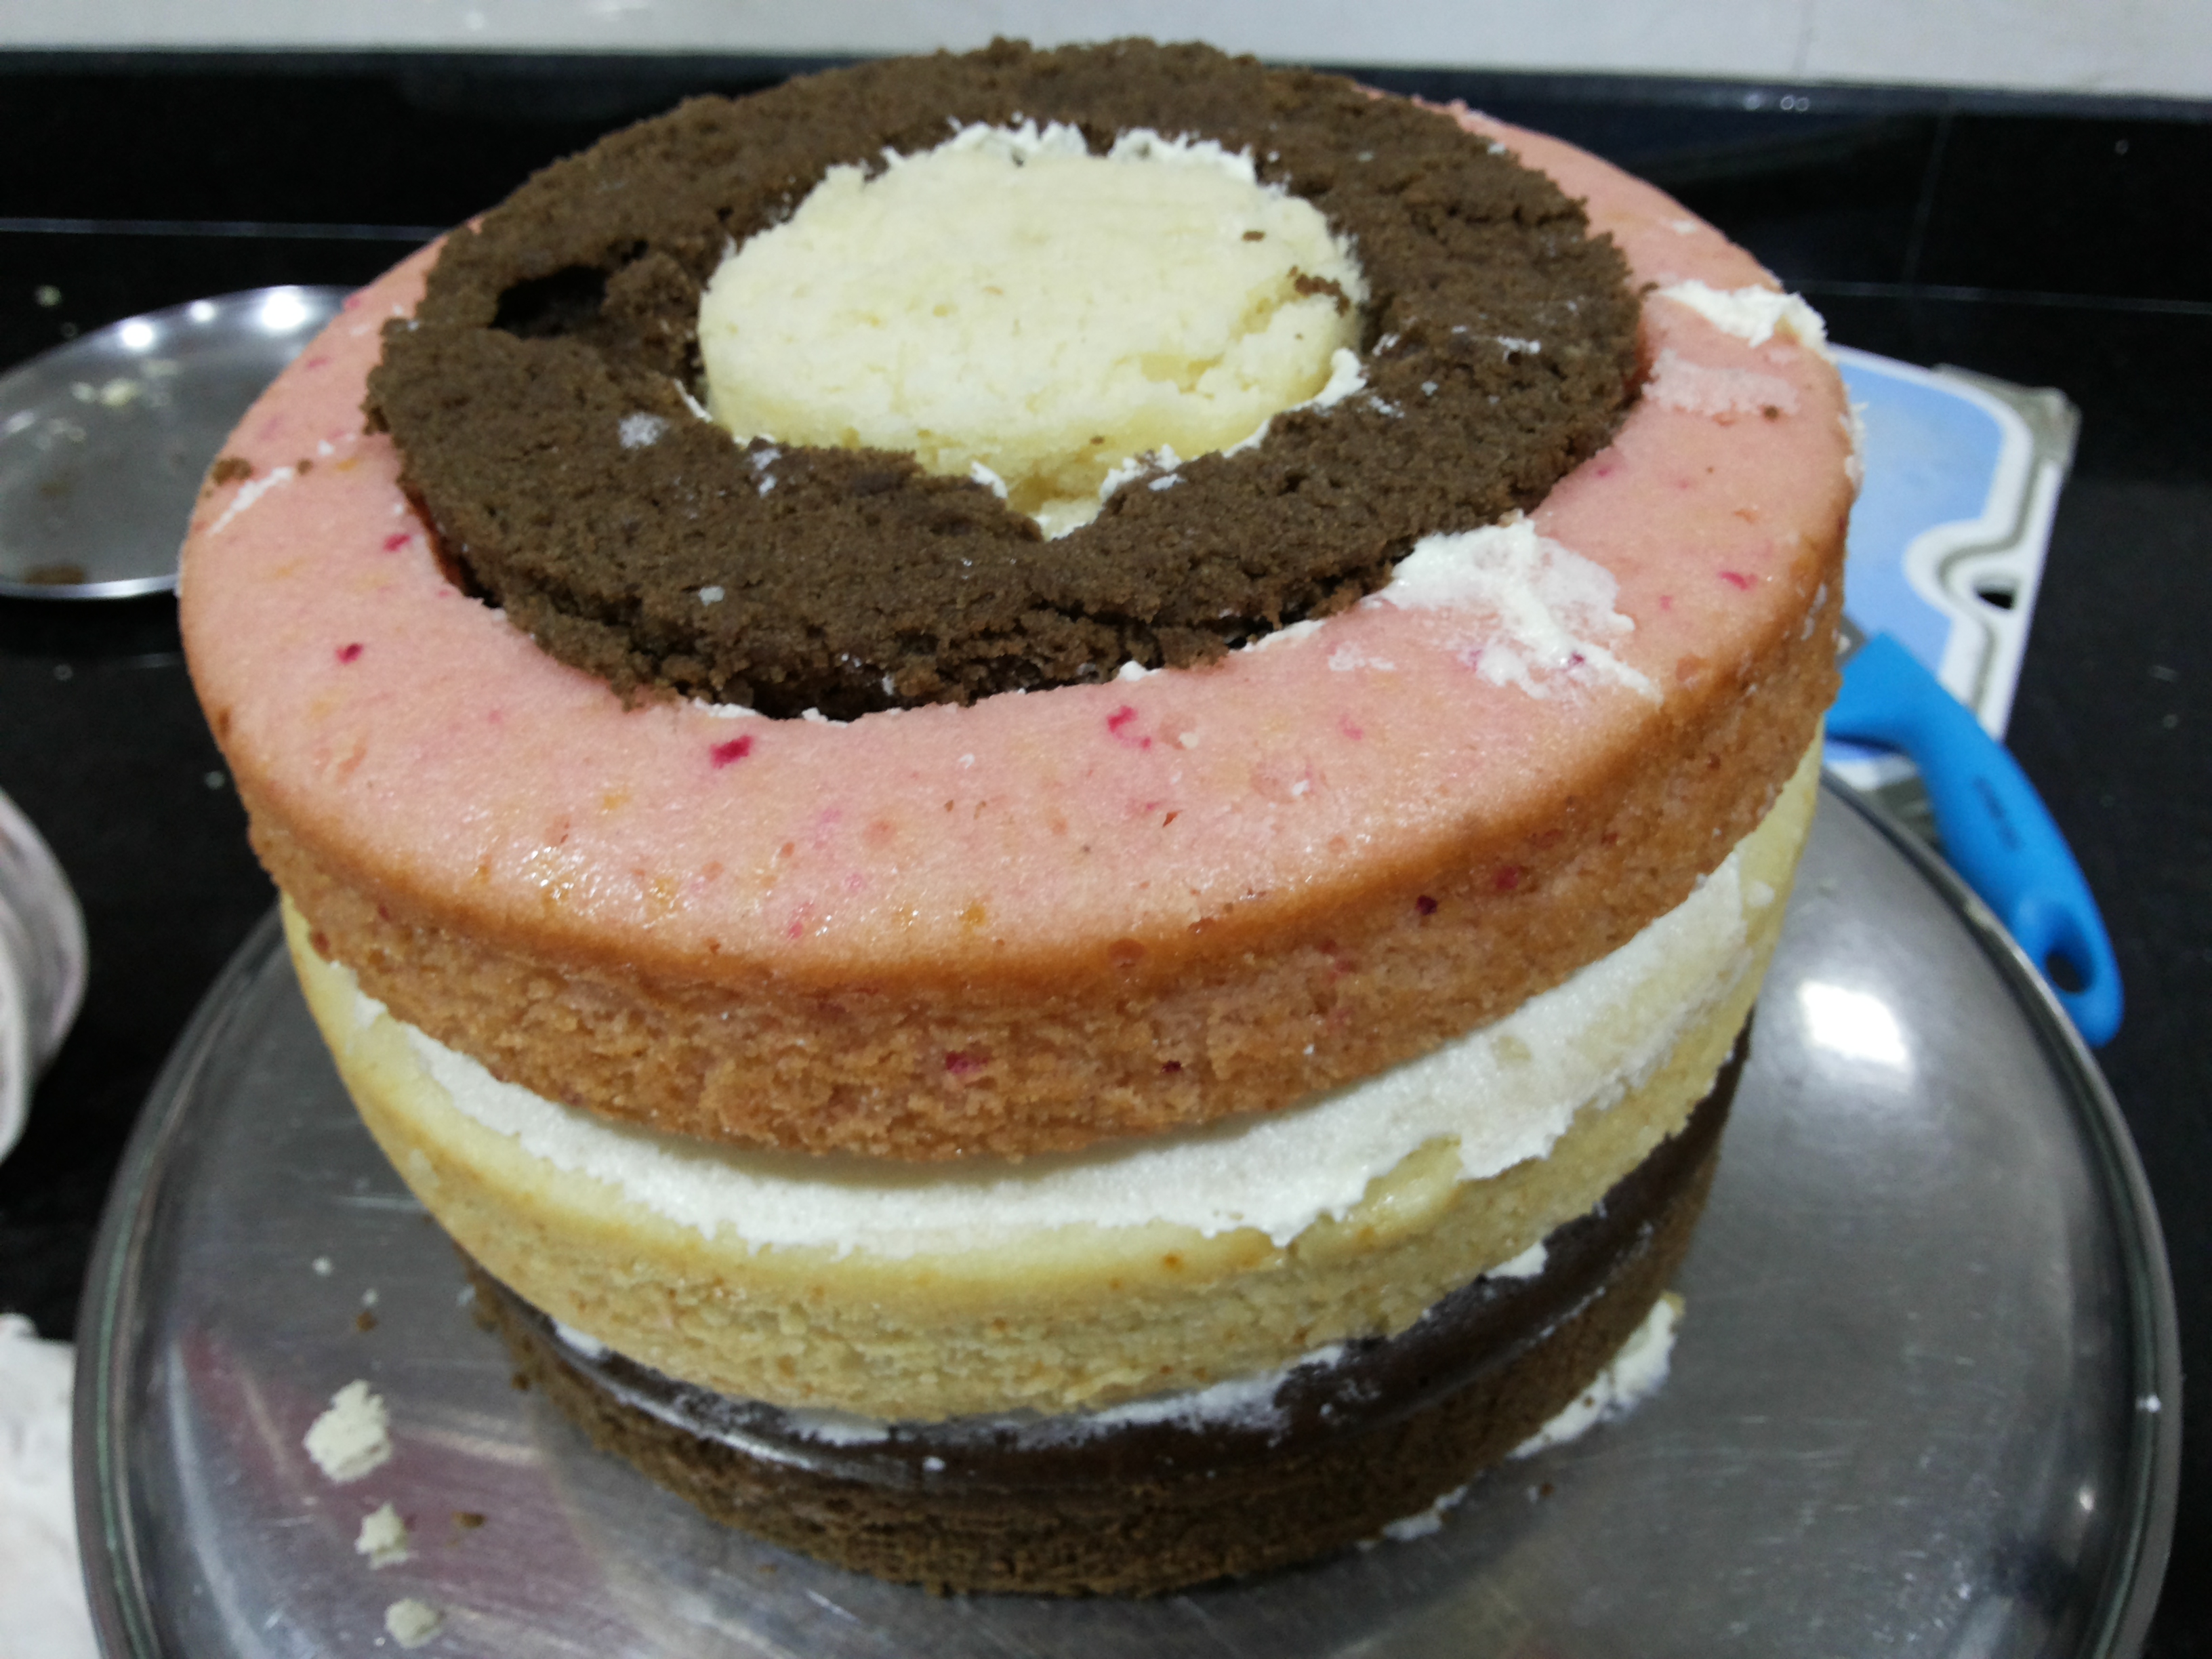
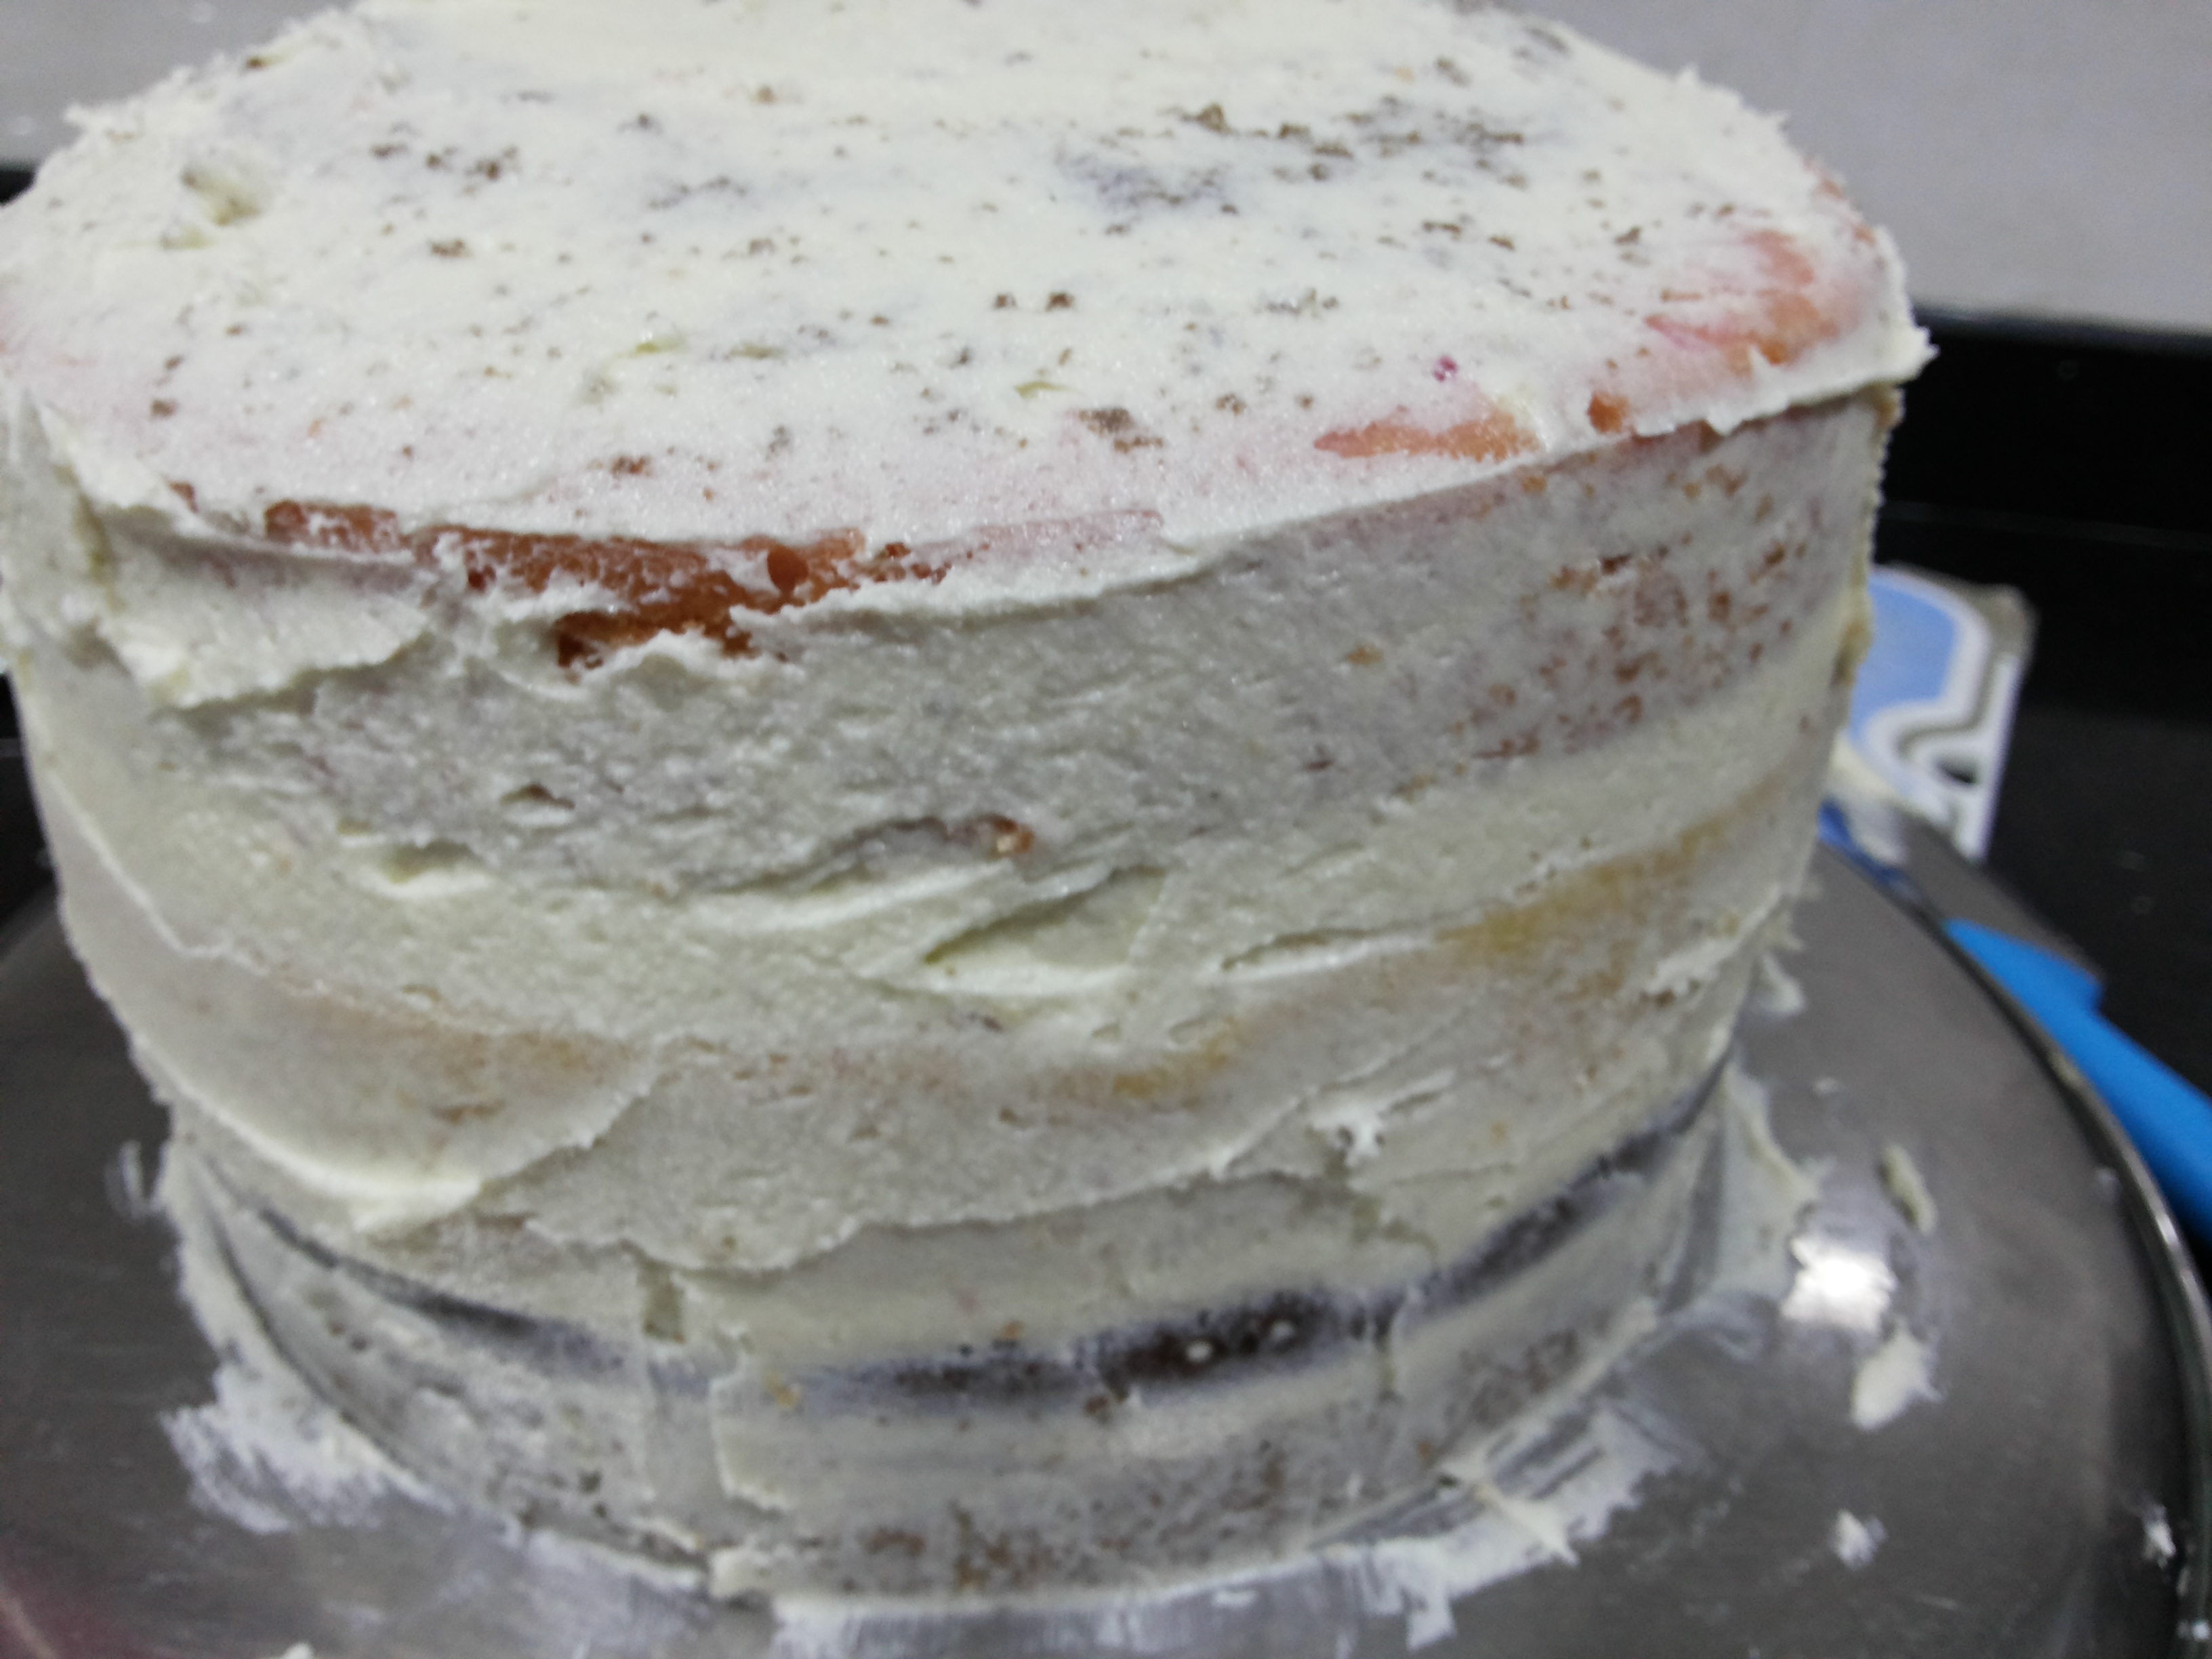
Now take a chocolate cake in a plate, spread icing over it, place vanilla cake over it and spread icing over it. DO this for all cake layers. After a thin coat / crumb coat of butter cream allow cake to rest in freeze for 2-3 hours.
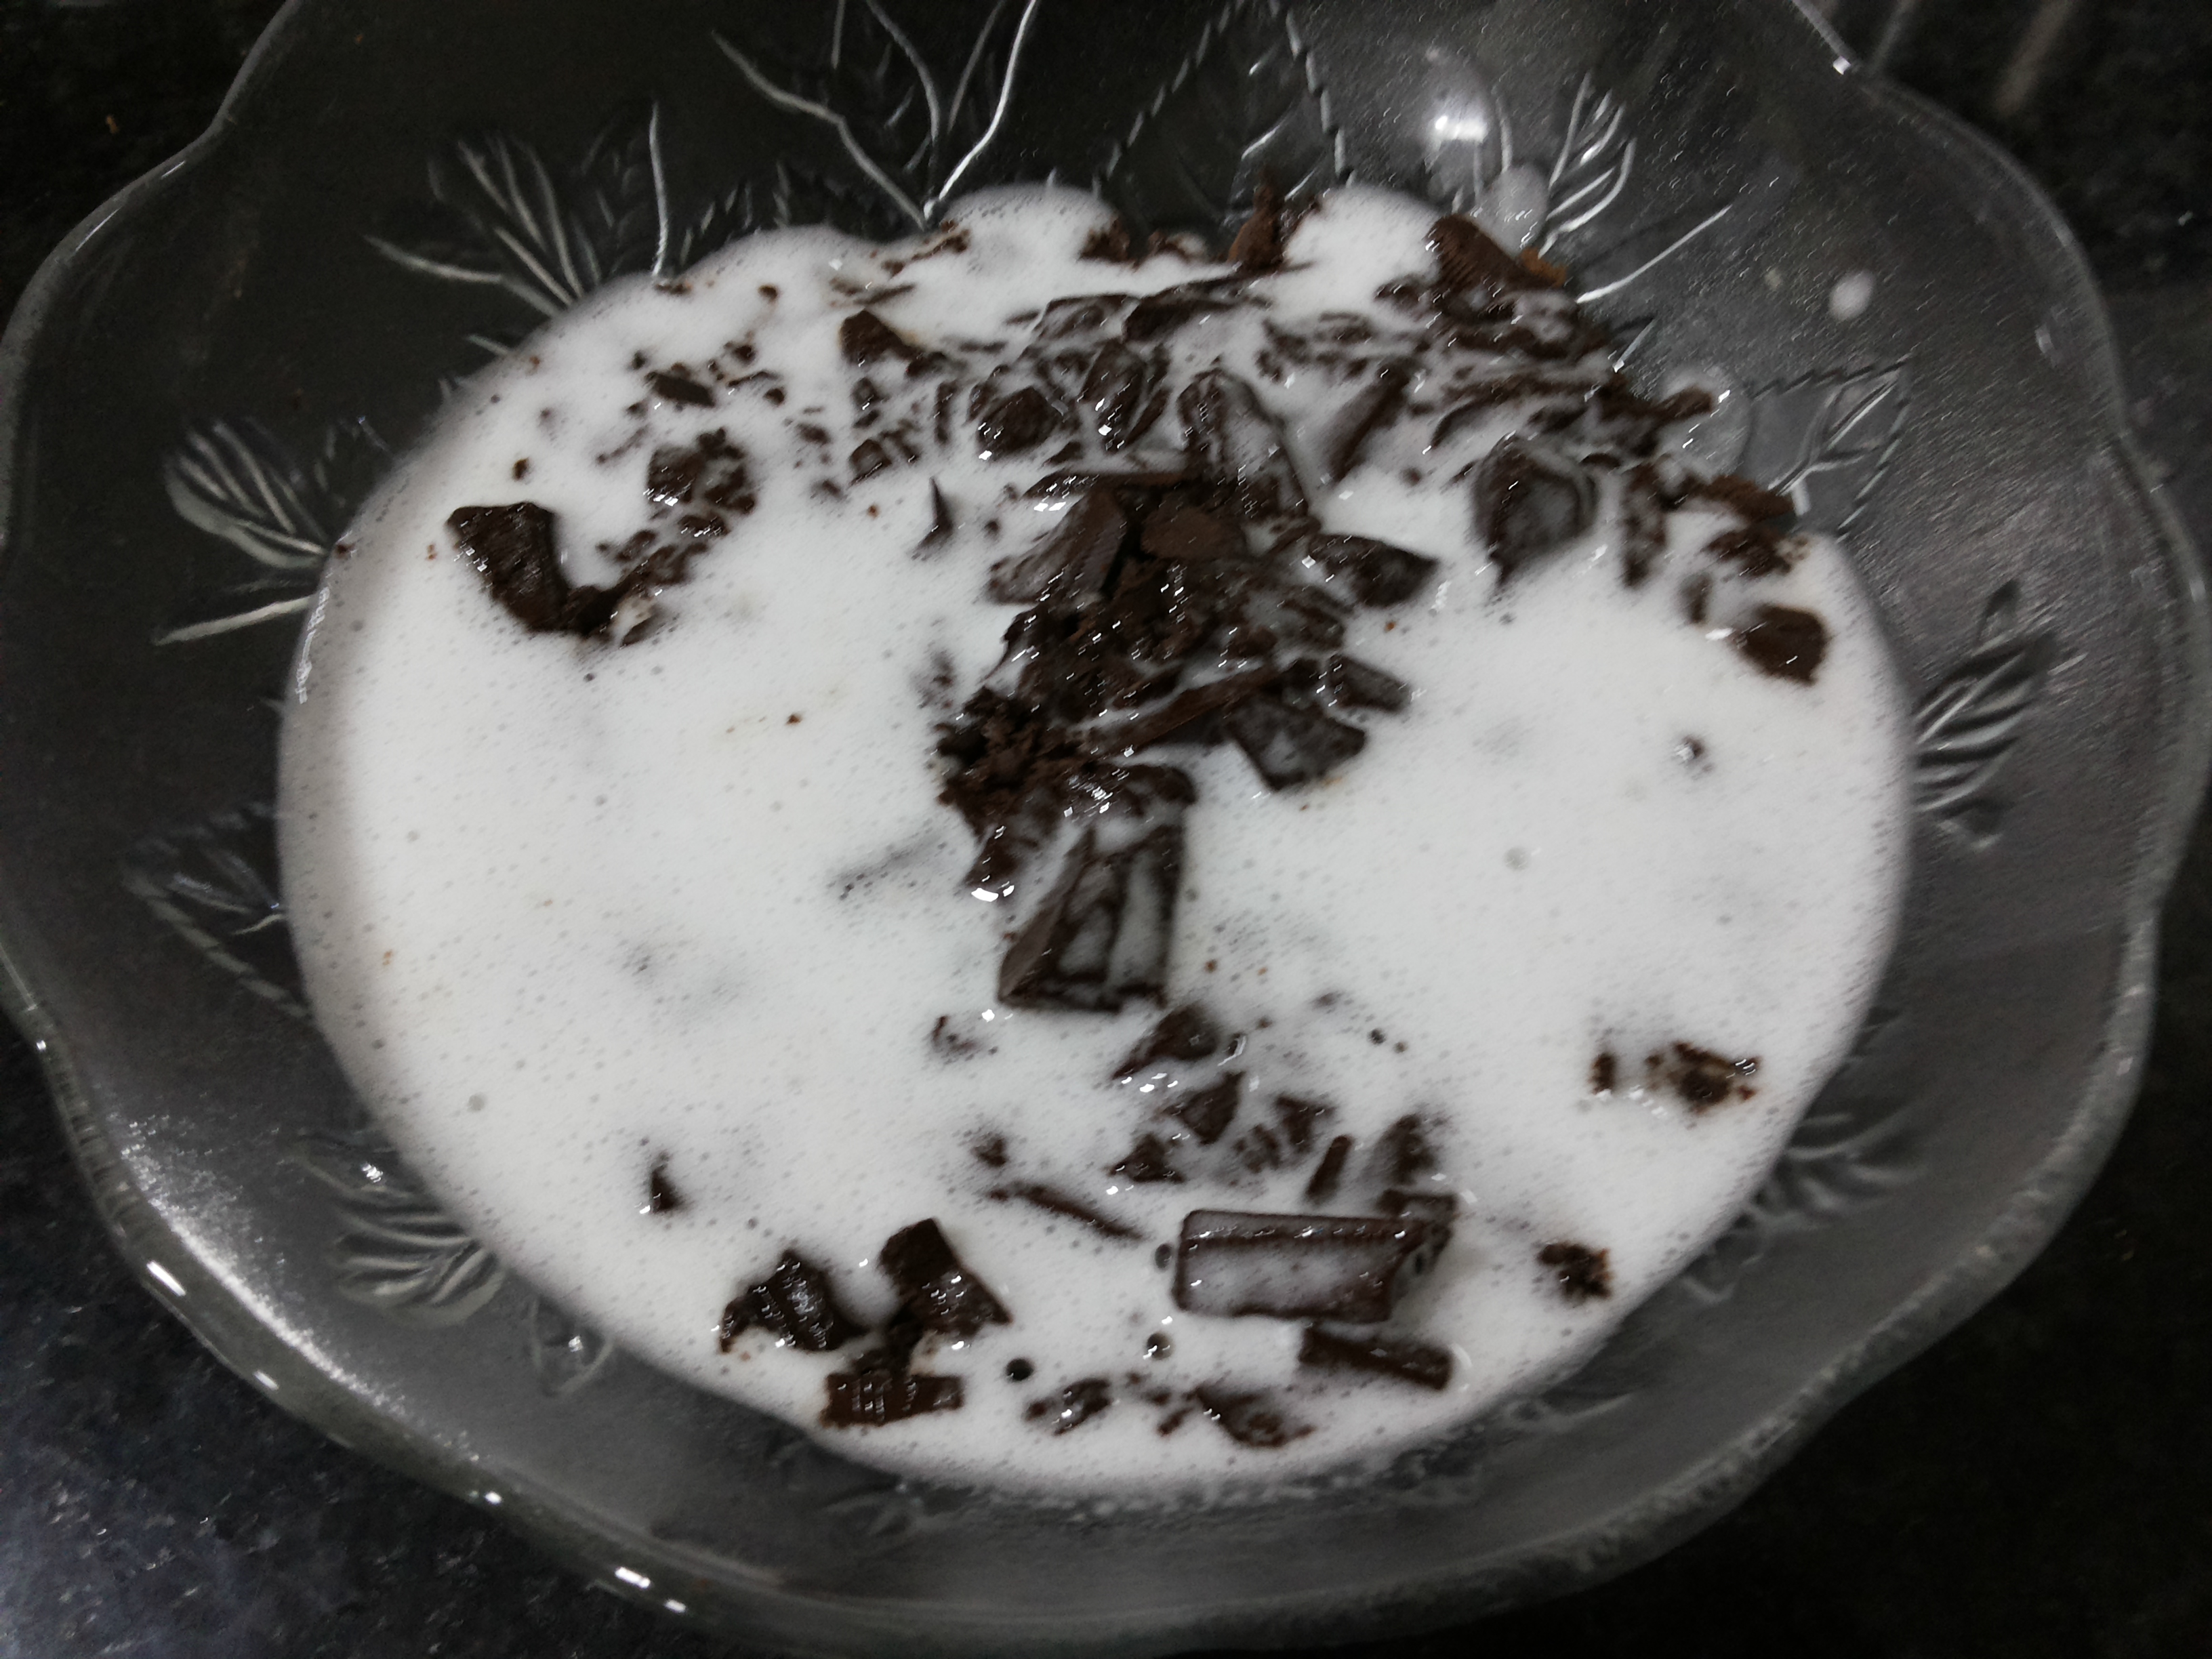
CHOCOLATE GANACHE RECIPE:
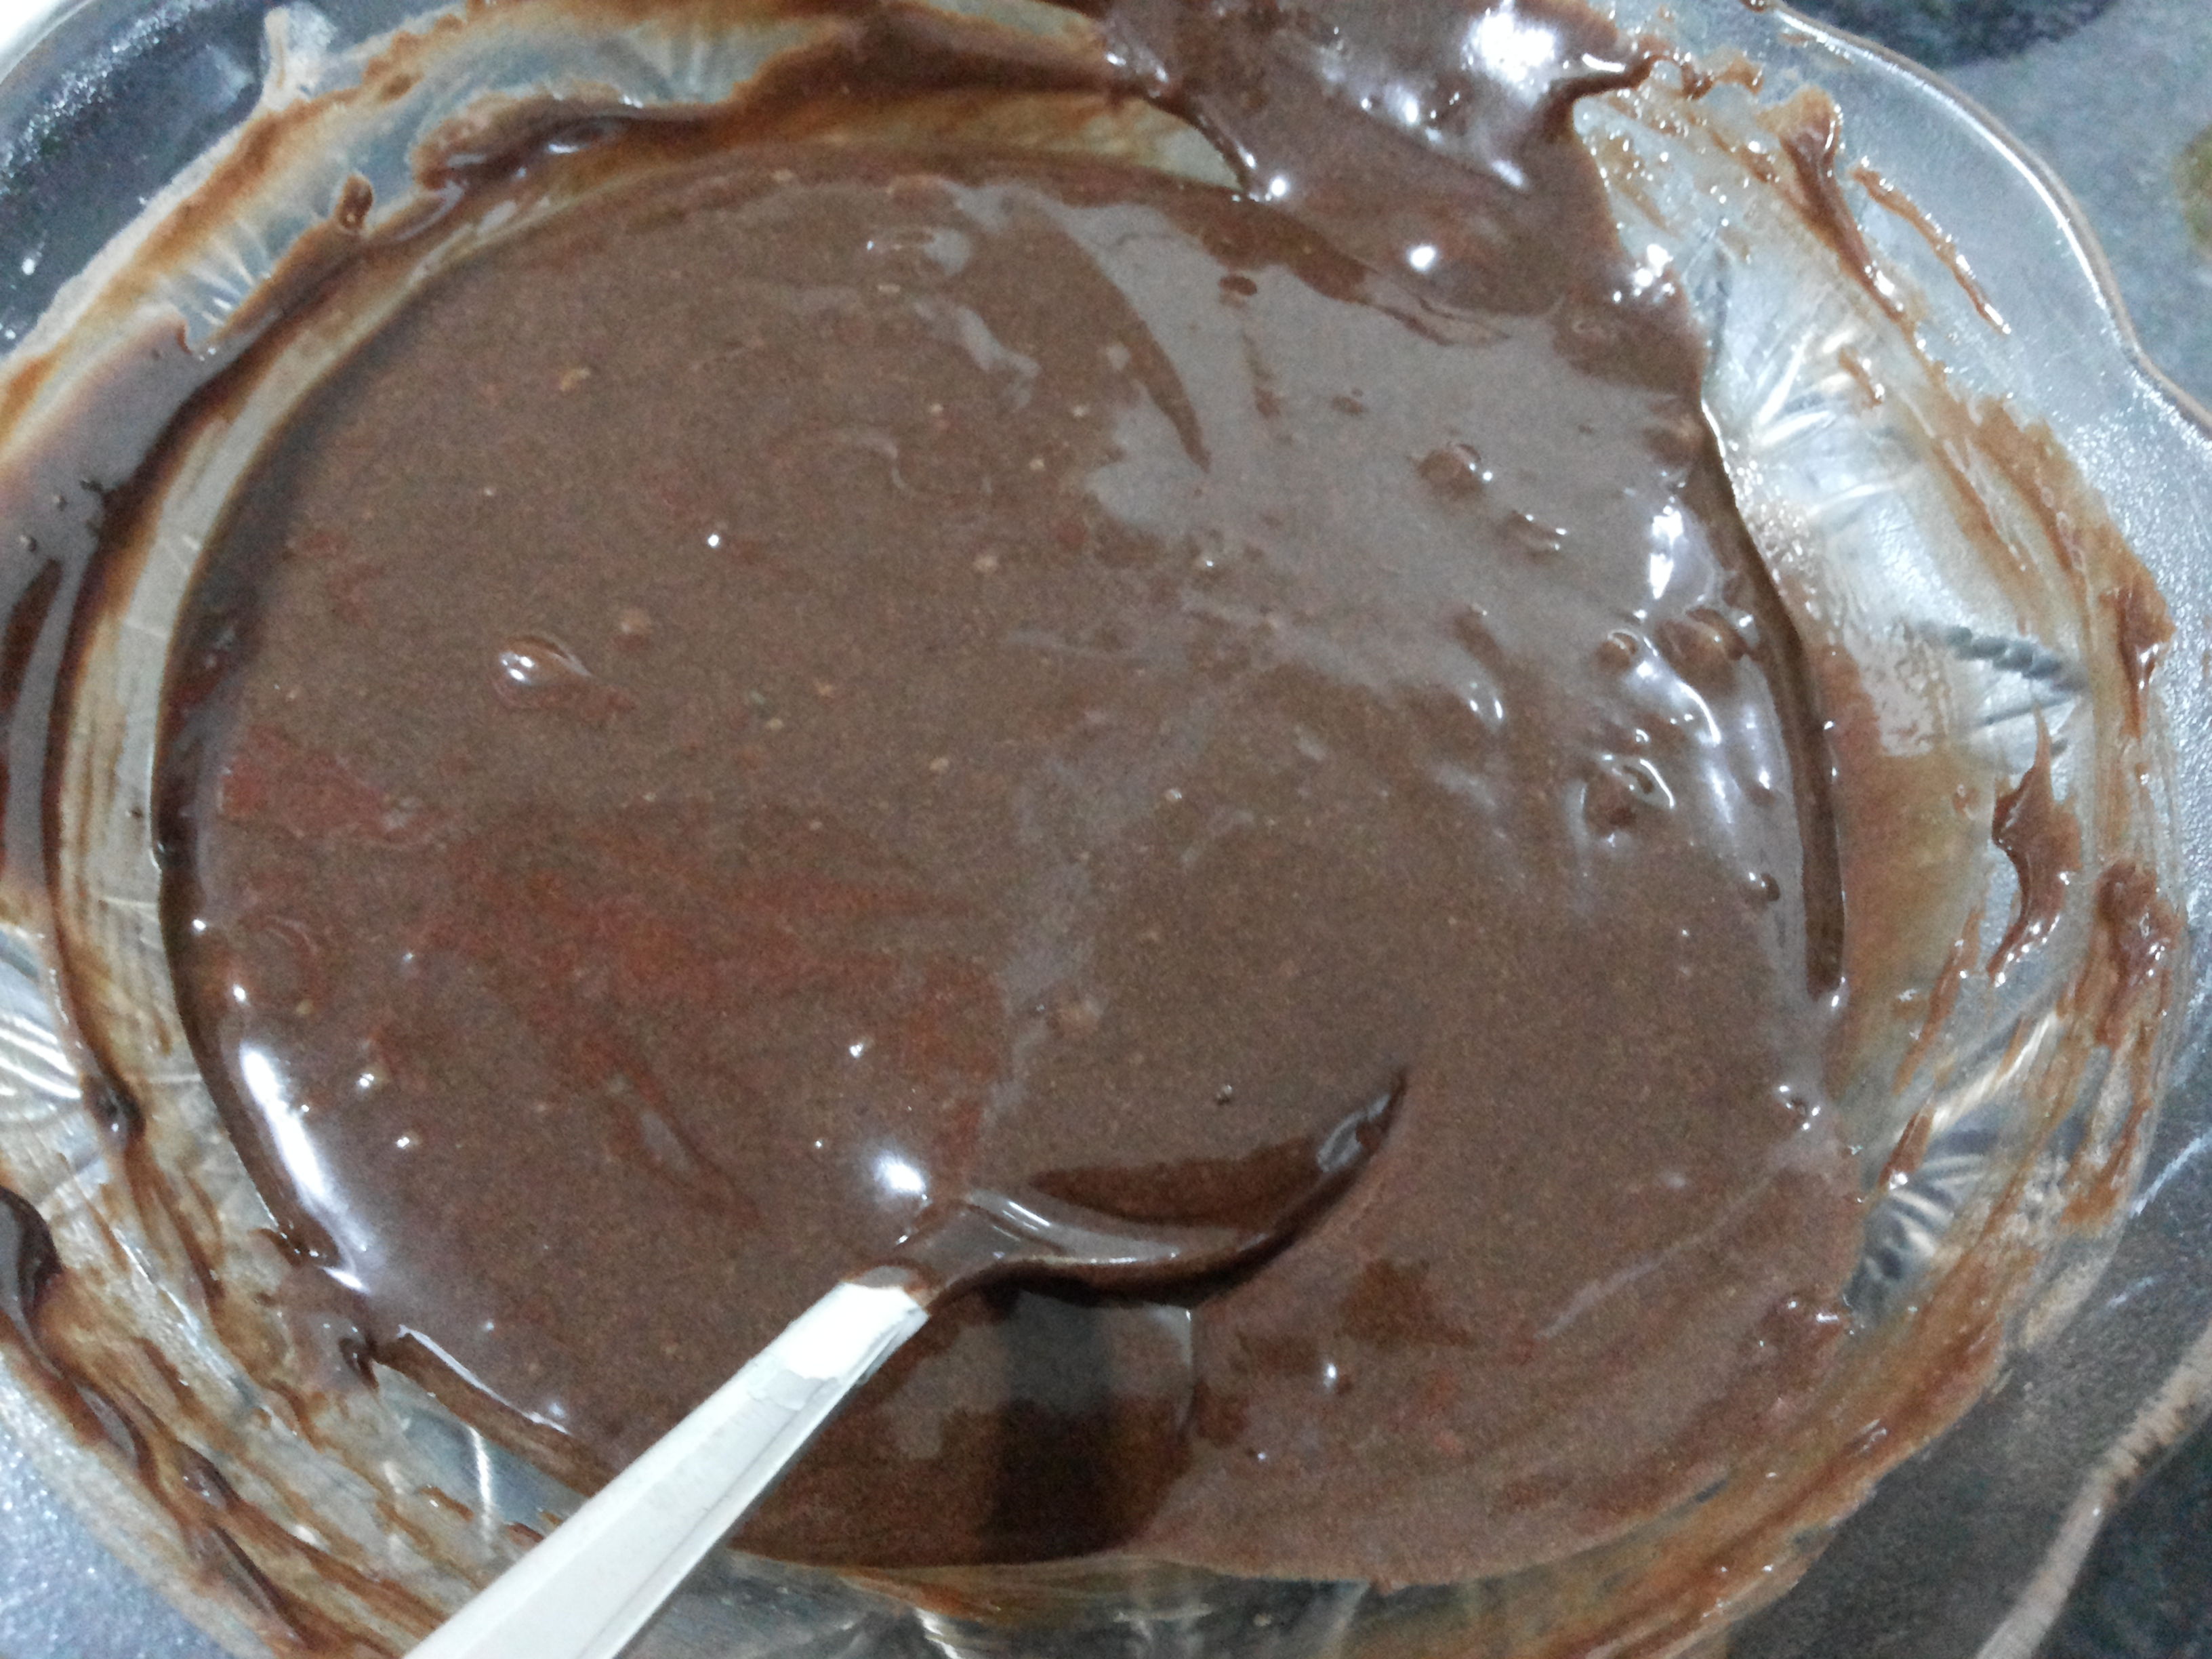
Chop the compound chocolate nicely . Pour a tsp of Honey on chopped Chocolate. Heat the Whipping cream till it starts boiling. Stir continuously. Don’t allow cream to boil . Now Pour cream on Chocolate. Wait for a minute or so, dont stir immediately else it will be cool soon and start giving lumps or unmelted chocolates. After a minute, stir very well till it becomes smooth and lump free liquid. Allow it to cool completely on room temperature . It will take around 40-45 minutes. Keep stirring in between. Once it cools it will be thick. For frosting bit thick consistency is good. But if you want to use in otherway like to pour on cake or something, use more cream and less chocolate.

Apply this cooled Ganache on sides of cake very patiently. Spread it nicely with scrapper . I used a piece of Sunmica 🙂 🙂
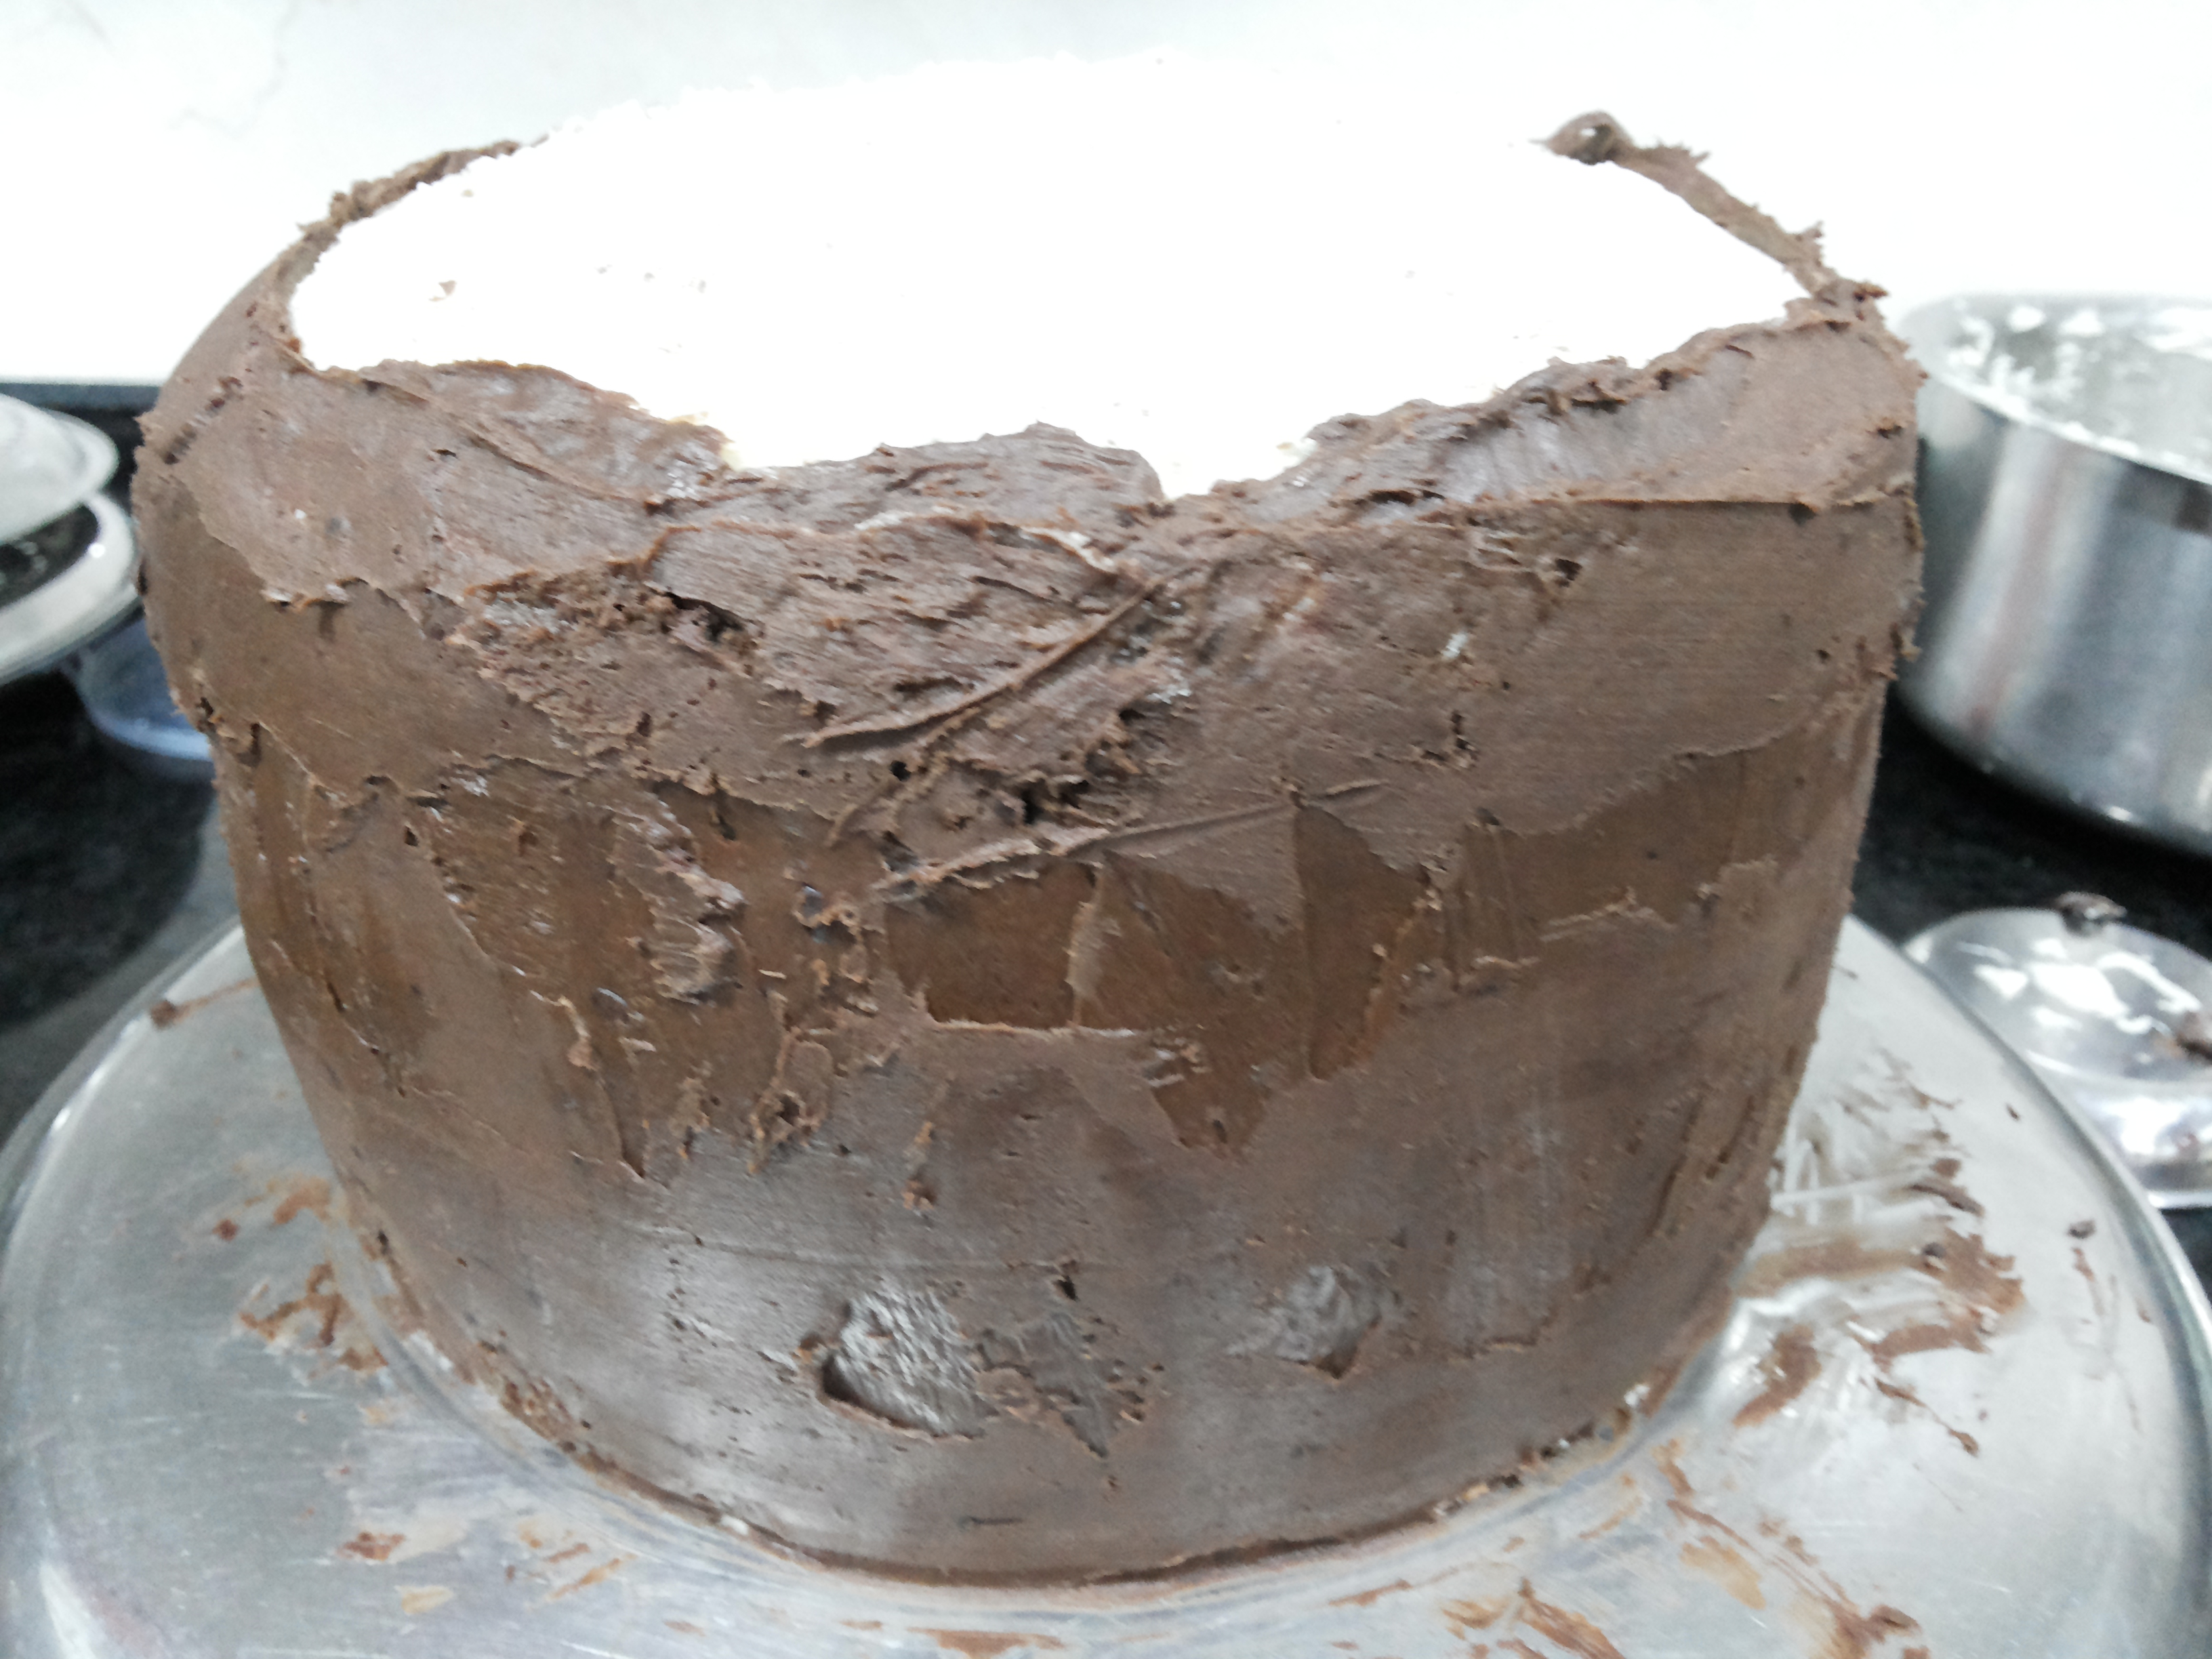
Added some Strawberry flavour to some of the butter cream and piped with plain butter cream.
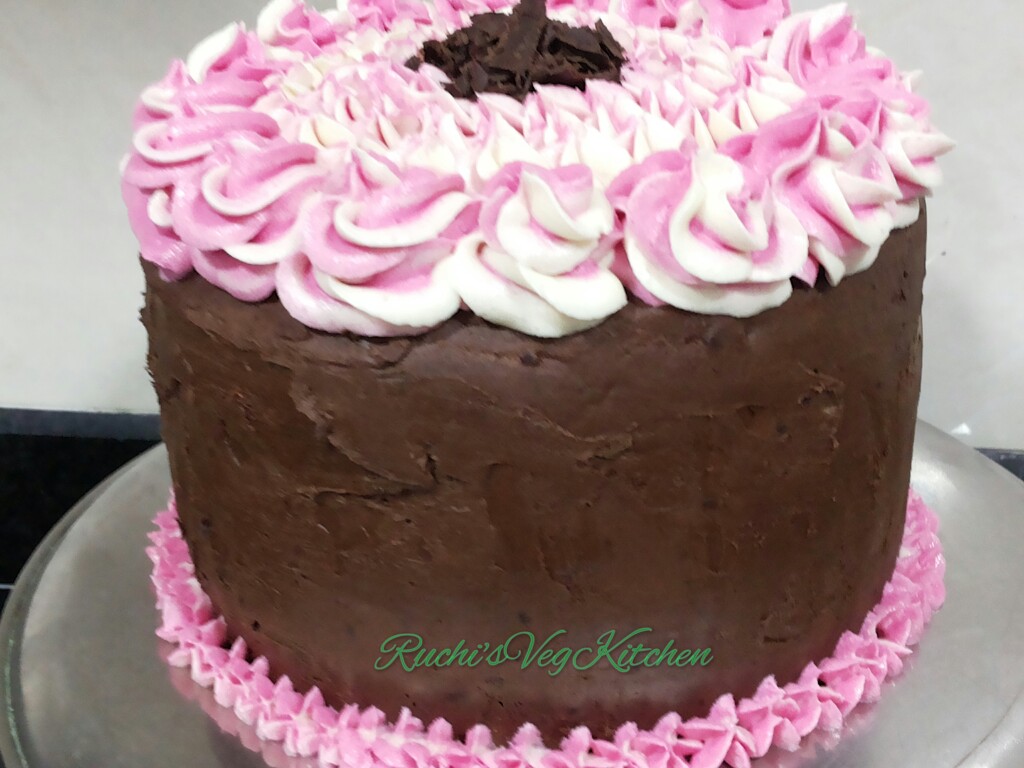
Chill the cake for 2 to 4 hours before slicing. Serve.
Hope you all will love the beauty and yummy taste of this cake.
Happy Cooking 🙂 🙂


wow that is a lot of effort. Amazing and what perfection in the checkerboard. Super love
http://www.mumbaitomelbourne.com/food-and-health-blog-posts/paneer-tikka-masala-cottage-cheese-in-tikka-gravy-base
LikeLiked by 1 person
Thank you so much dear. Yup it needs lot of patience and efforts but result is awesome.
LikeLike
lovely color for checkerboard cake and nicely explained…visit my page too
LikeLiked by 1 person
Thank you so much
LikeLike
OMG.. great effort and you have nailed it. Super awesome
LikeLiked by 1 person
Thank you so much dear
LikeLike
This is a gorgeous cake. Thank you for sharing the step by step procedure. I would love to try it.
LikeLiked by 1 person
Thank you so much . Would love to hear from you whenever u try.
LikeLiked by 1 person
Wat is the size of the pan used …
LikeLiked by 1 person
It’s 9inch pan
LikeLike
Ooooh this looks DELICIOUS! Thank you – your cake recipes are great.
It’s so nice to connect with you. Hope you are doing wonderfully. 🙂 Have a good week,
Debbie
LikeLiked by 1 person
Thank you so much Debbie. Thank you for your love. Take care
LikeLiked by 1 person
Amazing.. amazingly beautiful cake and well explained too
LikeLiked by 1 person
Thank you so much dear . Really glad to know you liked it
LikeLiked by 1 person